How to capture dazzling neon street portraits
6 minute read
There are many facets of street photography, and street portraits are on the rise. Utilising neon lights is a free and easy way to make yours stand out. Here’s why you should try it – and how to succeed.
Not so long ago, street photography was as raw and unfiltered as it came, serving up an honest and often stark insight into daily life. But times change and styles develop, and now, street photography encapsulates many things – one of which is the growing trend of street portraits.
Street portraits take the best of both worlds: the raw and impromptu nature of street photography, and the glamour and detail of studio portraiture. There are many ways to capture great street portraits, but today we’re focussing on just one. Neon lights.
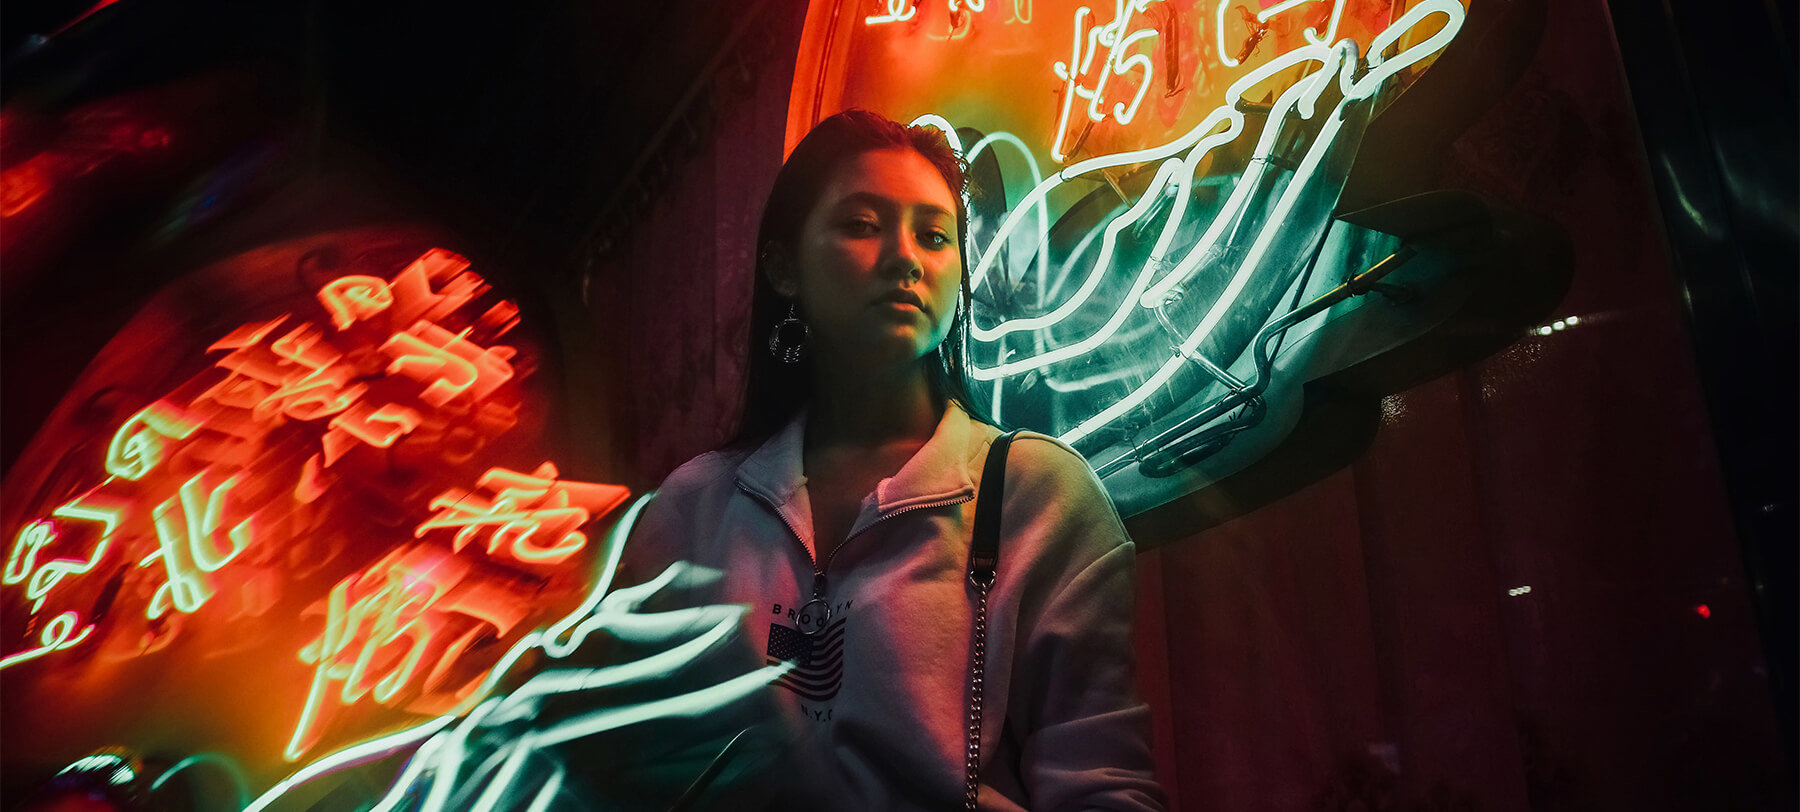
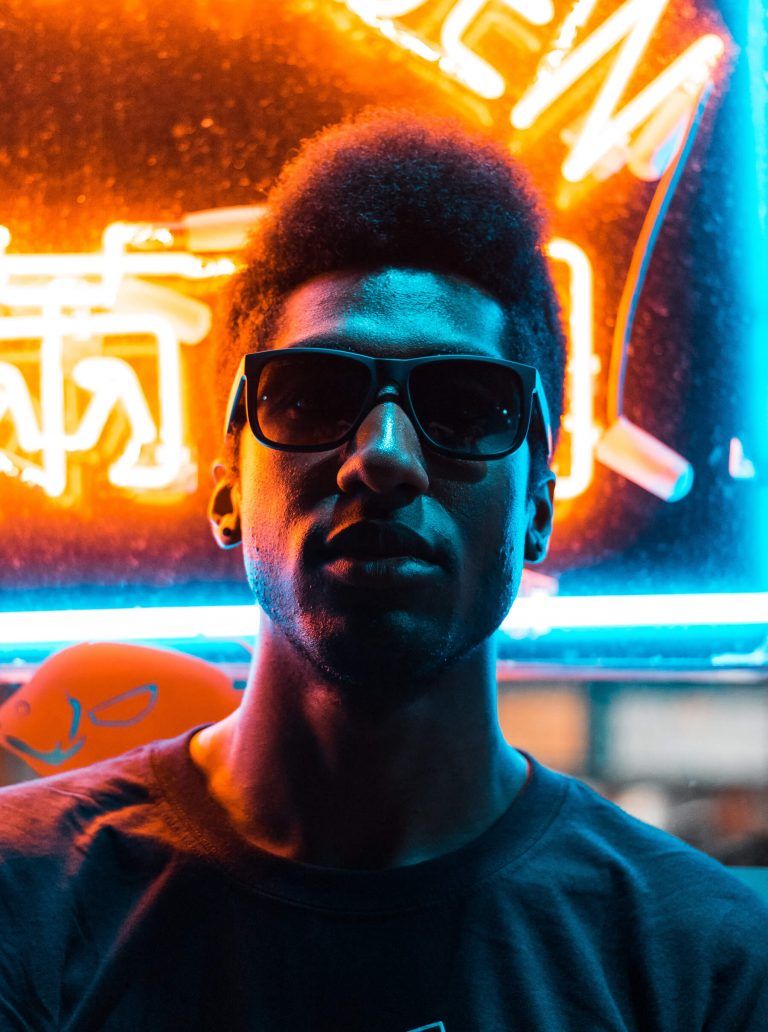
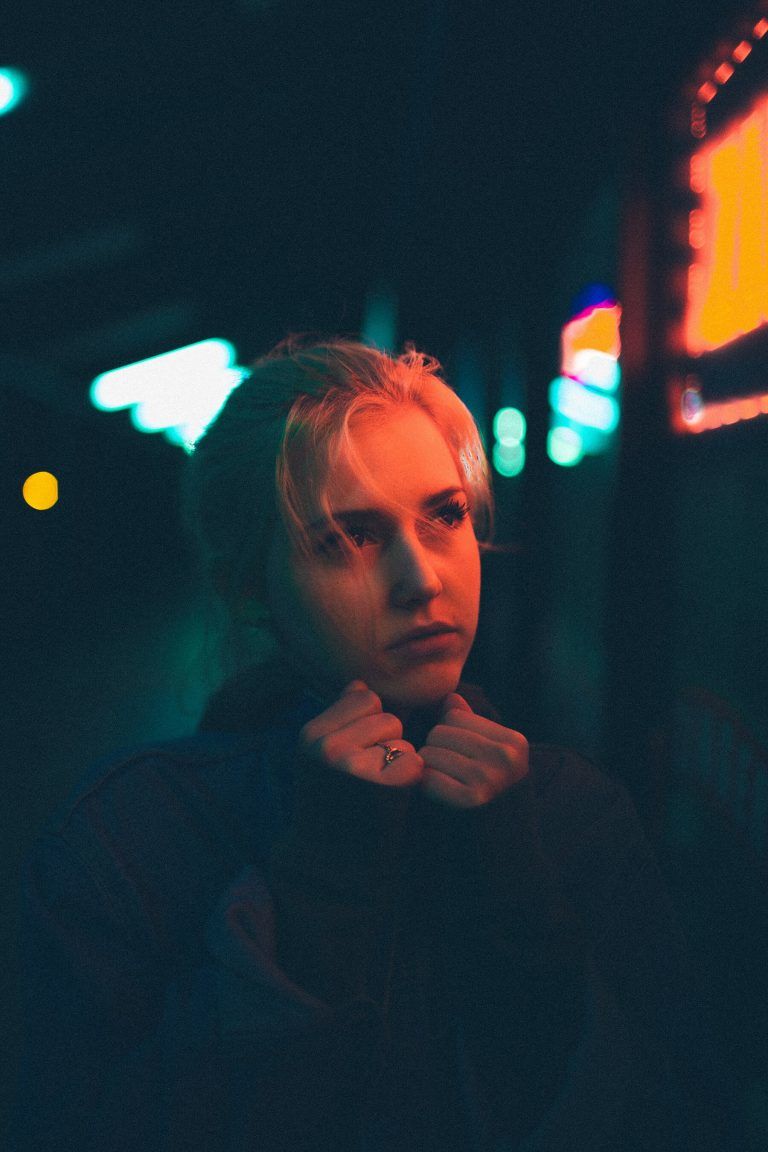
By using neon lights to light your street portraits, you can mimic the look of a studio light and coloured gel. It’s free, easy to do, and the results can look incredible. They’re a perfect example of putting a modern twist on some classical stylings, and as such, they’re sure to capture attention in the digital world of photography.
You can find neon lights all over the place – just take a walk down any nearby street that’s well-populated with shops or restaurants and we’re sure you’ll find a number of options. Don’t forget your model, unless you plan on propositioning members of the public or catching them in the perfect place.
Here are our tips for making sure your neon portraits are the best they can be.
Use lighting patterns
The chosen lighting pattern is the foundation of any portrait, regardless of how it’s lit, but especially in the case of artificial lighting. In this sense, using an artificial light on the street is no different to the studio, so the principles are the same.
We’ve got an in-depth feature that outlines the essential lighting patterns, so if you aren’t familiar with them, it’s well worth a read. It’s essential know-how for any type of portrait, no matter how or where you’re shooting them.
The important thing to remember here is that you can’t move your light source, but you can move yourself and your subject. Your options are going to be limited compared to a typical studio set-up, but overall, not too challenging.
Mix colours
As with a lot of street photography, when it comes to neon portraits you have to take what you can get. You may not have the luxury of many neon signs to choose from – at least not at first.
It may take a bit of hunting, but it’s not too hard to find a wider variety of options, including signs with multiple colours, or multiple differently coloured signs in close enough proximity to photograph. By design, multi-coloured neon signs often feature contrasting colours, such as green and pink or orange and teal.
These make for great portraits with more lighting options.
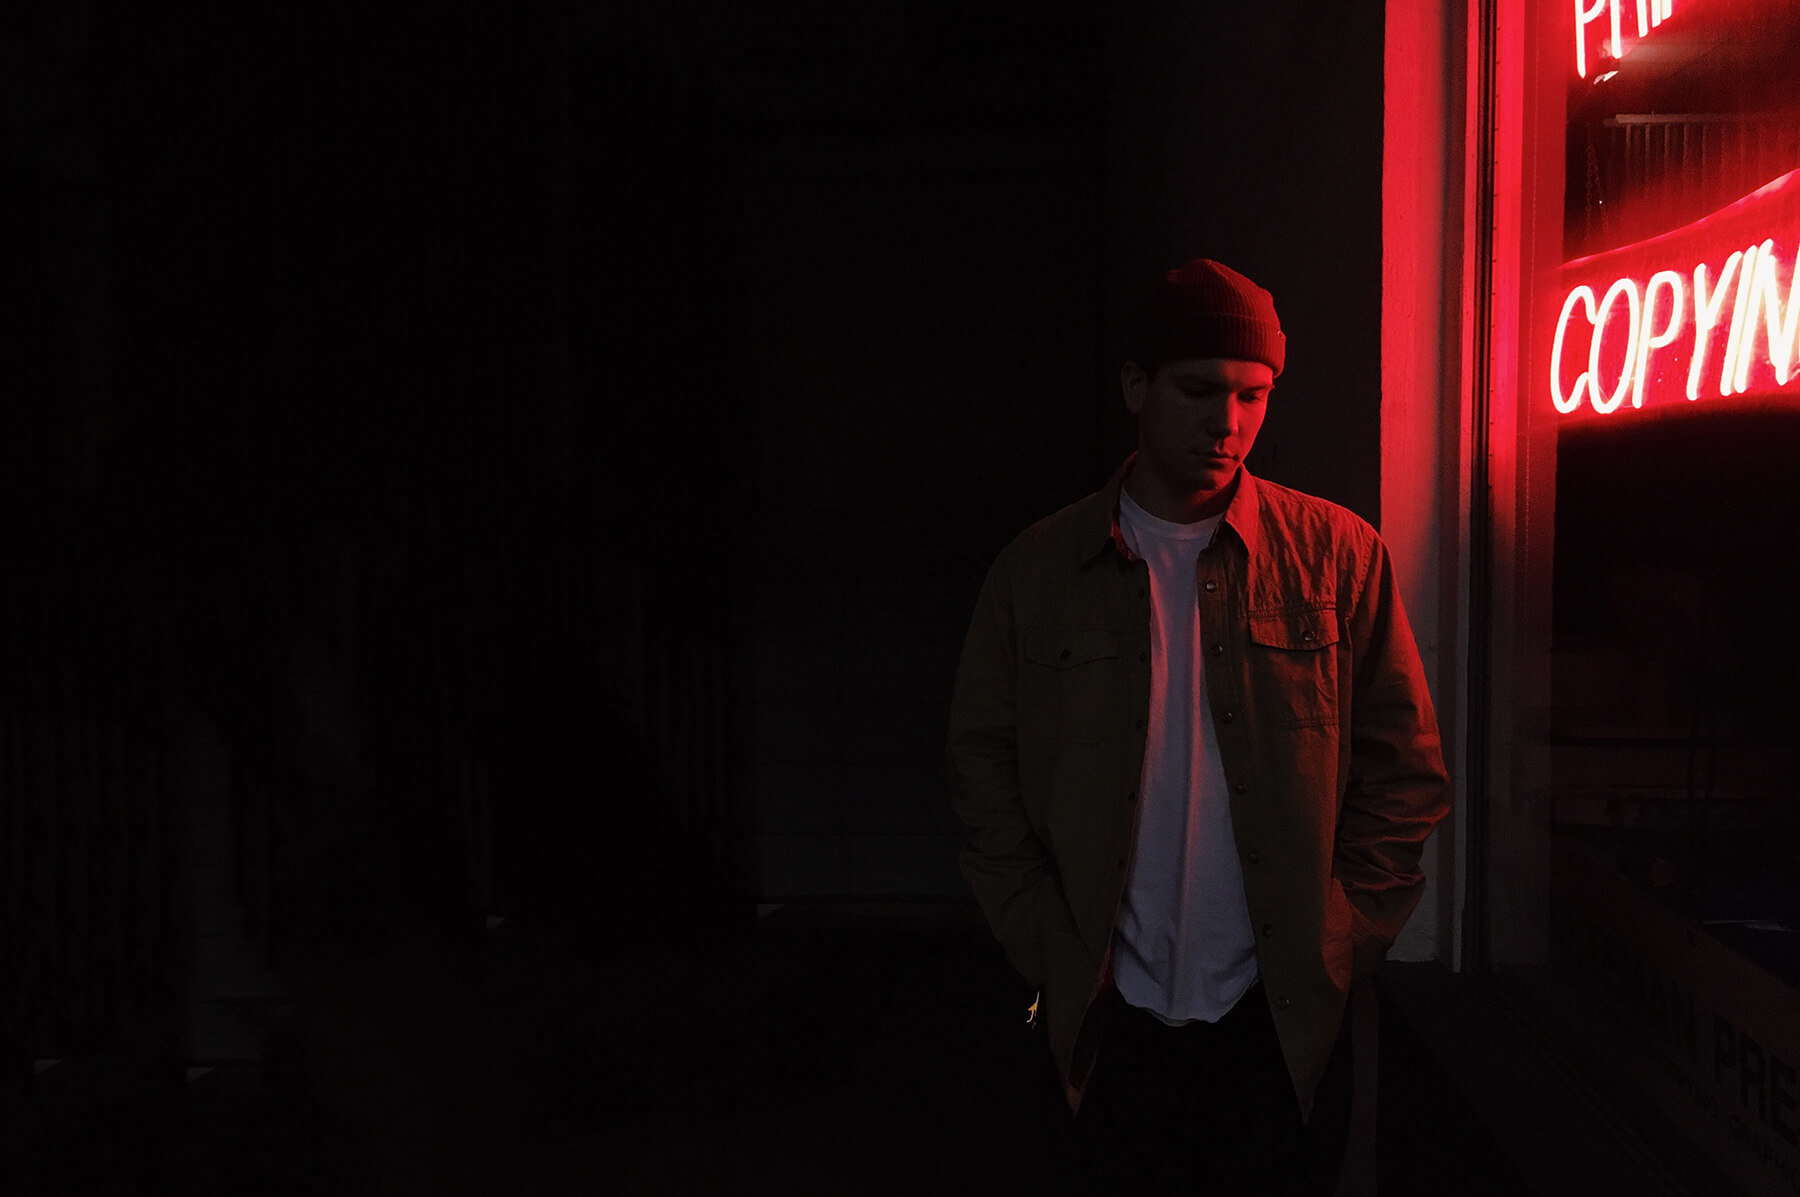
Get the perfect exposure
Shooting at night next to such a bright light source is almost always going to create conditions too difficult for your camera to capture in their entirety, no matter how good the camera’s dynamic range. But by exposing for the highlights, you can still capture a great portrait.
Live view, if your camera has it, is a big help here. Depending on your camera’s light metering mode (again, if it has it) it may appear that your photo is significantly underexposed. In live view, you’ll be able to judge for yourself and avoid overexposed highlights.
Bring some extra gear
We said one of the main benefits of utilising neon lights is mimicking those found in a studio, and we meant it. But if you do have some extra gear – even as little as a reflector or a single light – it can be of great help here.
Throwing in some fill lighting can remedy the exposure problem, give you more control over your lighting pattern and offer more colour options, provided you have a gel or another coloured light source to reflect.
Edit with split toning
If you’ve never tried or even heard of split toning, the basics are simple. We’re not going to go into great depth here, but we’ll give you the info you need to give it a try.
In short, split toning is the process of adding one colour to the highlights of a photo, and another colour to the shadows. It’s not hard to see how this works well in the case of a neon portrait – especially if you’ve managed to find a mix of colours as mentioned above.
Most editing software will give you the option of split toning, and steps may vary, but in Photoshop, the process is as follows.
With your image open, add an adjustment layer, then click Colour Balance. Next to Tone, select Shadows or Highlights. From here, you can adjust the colour using the sliders. You can bring out only the highlights or shadows, or you can add a second adjustment layer and play with both.


Will you be including some neon portraits in your street photography catalogue? If so, be sure to show us on social media! Tag us in your photos on Instagram or Twitter using the handle @photonewspn or get in touch on Facebook.
Don’t forget to sign up to receive our newsletter below, and get notified about the new issue, exclusive offers and competitions.