The essentials of astrophotography
Photographing the night sky can produce some truly awe-inspiring results. Here are the kit, settings, and top tips you need to improve your astrophotography skills.
Read time: 7 minutes
Astrophotography is one of those photographic genres that may seem difficult to break into, but realistically, you can capture some incredible results with kit you already own. All you have to do is commit to getting out there and giving it a try. Before you do, though, we’re here to ensure you’re prepared.
Astrophotography camera gear
As we said, you really don’t need much kit to get great results – any fairly modern DSLR or mirrorless system will be absolutely fine. When it comes to lens choice, this may be determined by what lens you own, and that’s fine, too. It’s probably best to opt for something wide if you have it – whatever you’d use to capture a landscape.
Hopefully you already own a tripod, too, but if you don’t, we’d strongly recommend one. It’s not just essential for astrophotography, but for so many other genres in photography, too. A remote shutter and intervalometer will also be very handy tools, but your camera may already have these things built in, in the form of a shutter timer and a time-lapse mode.
Another key piece of kit for those long night-time shoots is spare batteries, particularly when the temperature drops and your battery’s life drops with it. Purchase an extra or two, and make sure they’re charged and packed.
You’ve got to take care of yourself as well as your camera. If you are shooting in colder temperatures, wrap up warm. It’s also worth checking the minimum temperature your camera and lens can function in if they aren’t weather sealed. Try to avoid warming and cooling your lens too quickly, too, or it may get condensation inside.
For those keen to explore deep space, entry-level astrophotography telescopes aren’t as wildly expensive as you might assume, but clearly this is more advanced kit.
Our final tip on gear: bring a torch. This one doesn’t need explaining, does it?
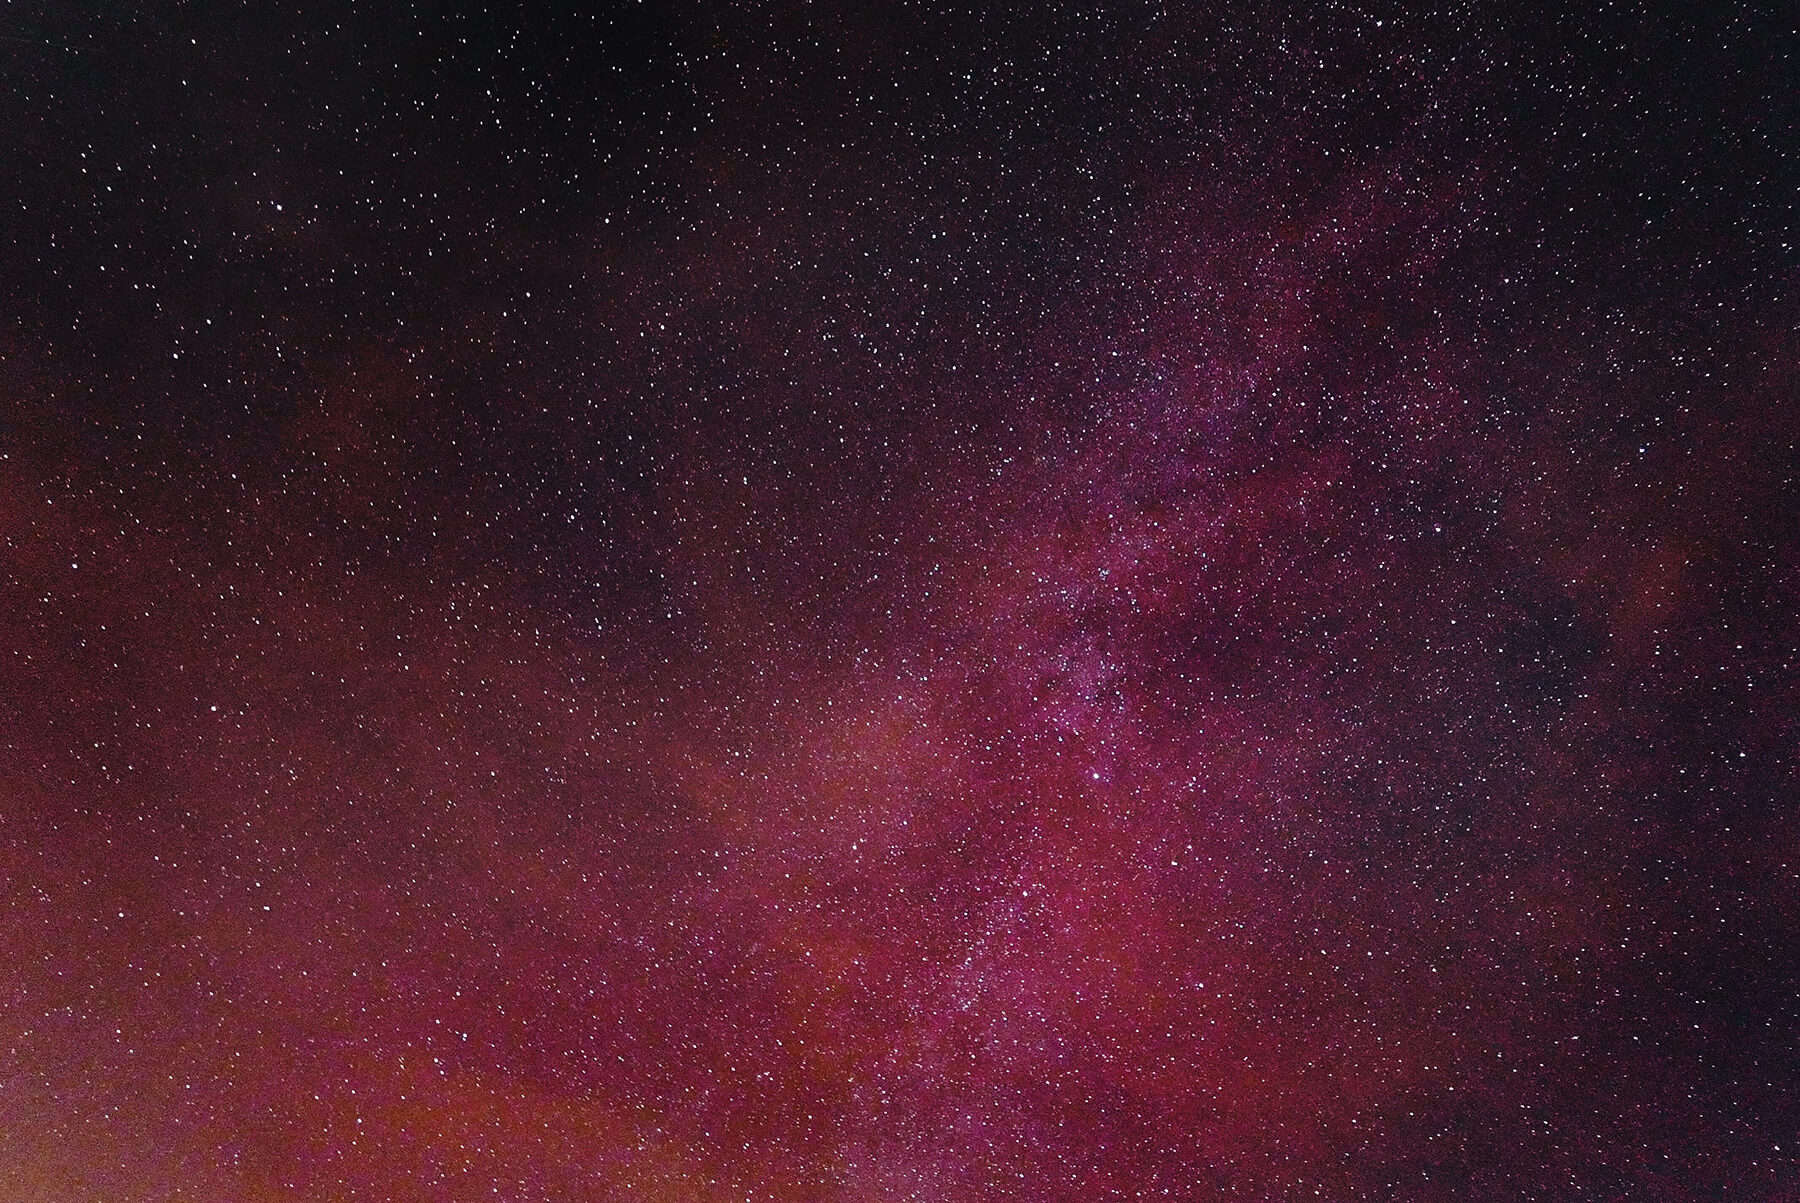
Image The reds of deep space are usually only captured using a photography telescope (credit: Octavian Rosca)
Camera settings for astrophotography
Getting your gear together is one thing, but you’ll need to know how to use it effectively. If you aren’t familiar with manual exposure, take some time to read our feature, then come back for these next tips.
If you’re more of an experienced photographer, the settings required for astrophotography won’t come as much of a surprise. For these very low-light conditions, open your aperture to something close to its lowest f/stop – something below f/4, if possible. A long exposure will also be needed, so set your shutter speed around 30 seconds. As for ISO, you’ll need something high enough to pick up the light but not so high that it produces a lot of noise. This will vary from camera to camera.
To find the right balance, you’ll need to take a few test shots and adjust your exposure settings accordingly.
You’ll need to use manual focus settings, too. If you’re familiar with infinity focus, this will be no issue for you, but if you’re not, there are a few ways you can go about it. Firstly, we’d advise not waiting until you’re there and ready to shoot to try this for the first time – it can be time consuming and trying it in the dark isn’t ideal.
Some lenses have a specifically marked infinity focus point. Confusingly, this may not be an exact indicator of infinity focus, but it will certainly be in the ballpark.
One simple way of pinpointing your infinity focus point is to set your camera up on your tripod with a very distinctive and far-away object in frame. Next, use autofocus or focus manually to ensure the object is sharp – live preview, focus assist and focus peaking are extremely helpful here. When you’re certain your distant object is in clear focus, take note of your focus ring’s position, and there you have your infinity focus point.
If you are in a pinch on the night, you can use the moon – provided it’s visible – as an object to focus on.
Tips and tricks
You have all the technical knowledge you need, but there are still a few tips and techniques you can employ to help you succeed and capture more creative shots. This first is star trails.
Star trails are created during very long exposures. Specifically, those so long that the movement of the stars is captured. Star trail photos can be completely mesmerising, and they’re fairly simple to capture.
Use some test shots to dial in your exposure settings, then shoot away. For very long trails, set your intervalometer or camera’s time lapse mode to take as many as a few hundred photos over time. The longer the time lapse, the longer your trails will be. When you have your photos, stack them with dedicated star trail software, or do it yourself in Photoshop if you’d prefer.
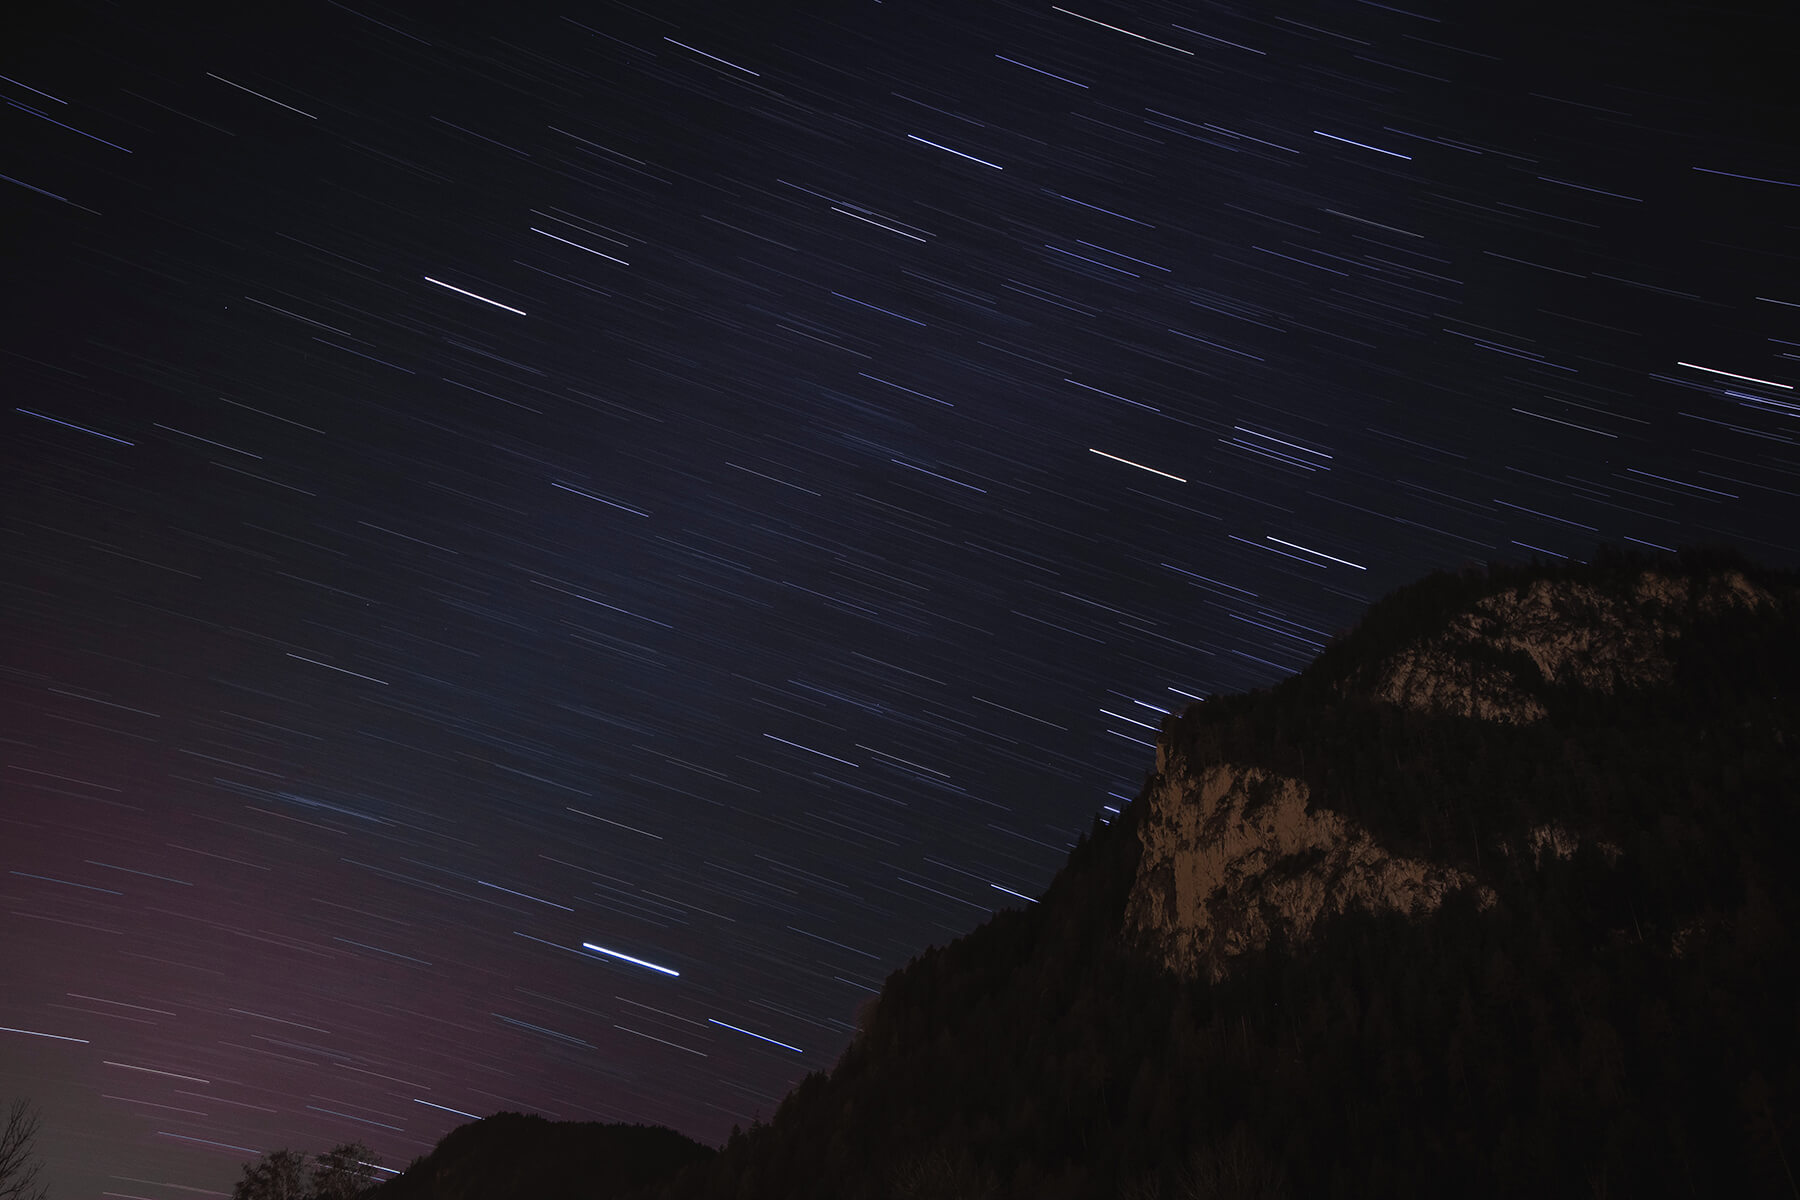
Image This fairly short star trail is the result of an accumulative 930secs exposure (credit: Lukas Spitaler)
For those who want clear and still starscape shots, you’ll need a slightly higher shutter speed. But with a higher shutter speed, you’ll need to bump up your ISO, which can lead to noise. Luckily, with our second technique, you can avoid that.
Again, by stacking a number of photos, you can affect what’s known as the signal-to-noise ratio. What that really means in terms of this technique is simple – by stacking a number of photos, the brightness of the stars appears to increase, but the noise doesn’t.
Much like star trails, there are many software options available specifically designed for this purpose, but if you need to, you can do it yourself by stacking your photos as layers in Photoshop, aligning the photos, then adjusting the opacity of each layer as desired.
First you need your photos, though. Again, by using some test shots, you’ll need to find the correct shutter speed. This time, you’re looking for one that doesn’t capture any movement. Once you have your settings dialled in, take a number of frames – the more you take, the more you’ll increase your signal-to-noise ratio, but there is a limit. Around ten frames works well.
When image stacking for this purpose, you’ll need to make sure your photos are taken within a short space of time, otherwise you’ll create a star trail as outlined above.
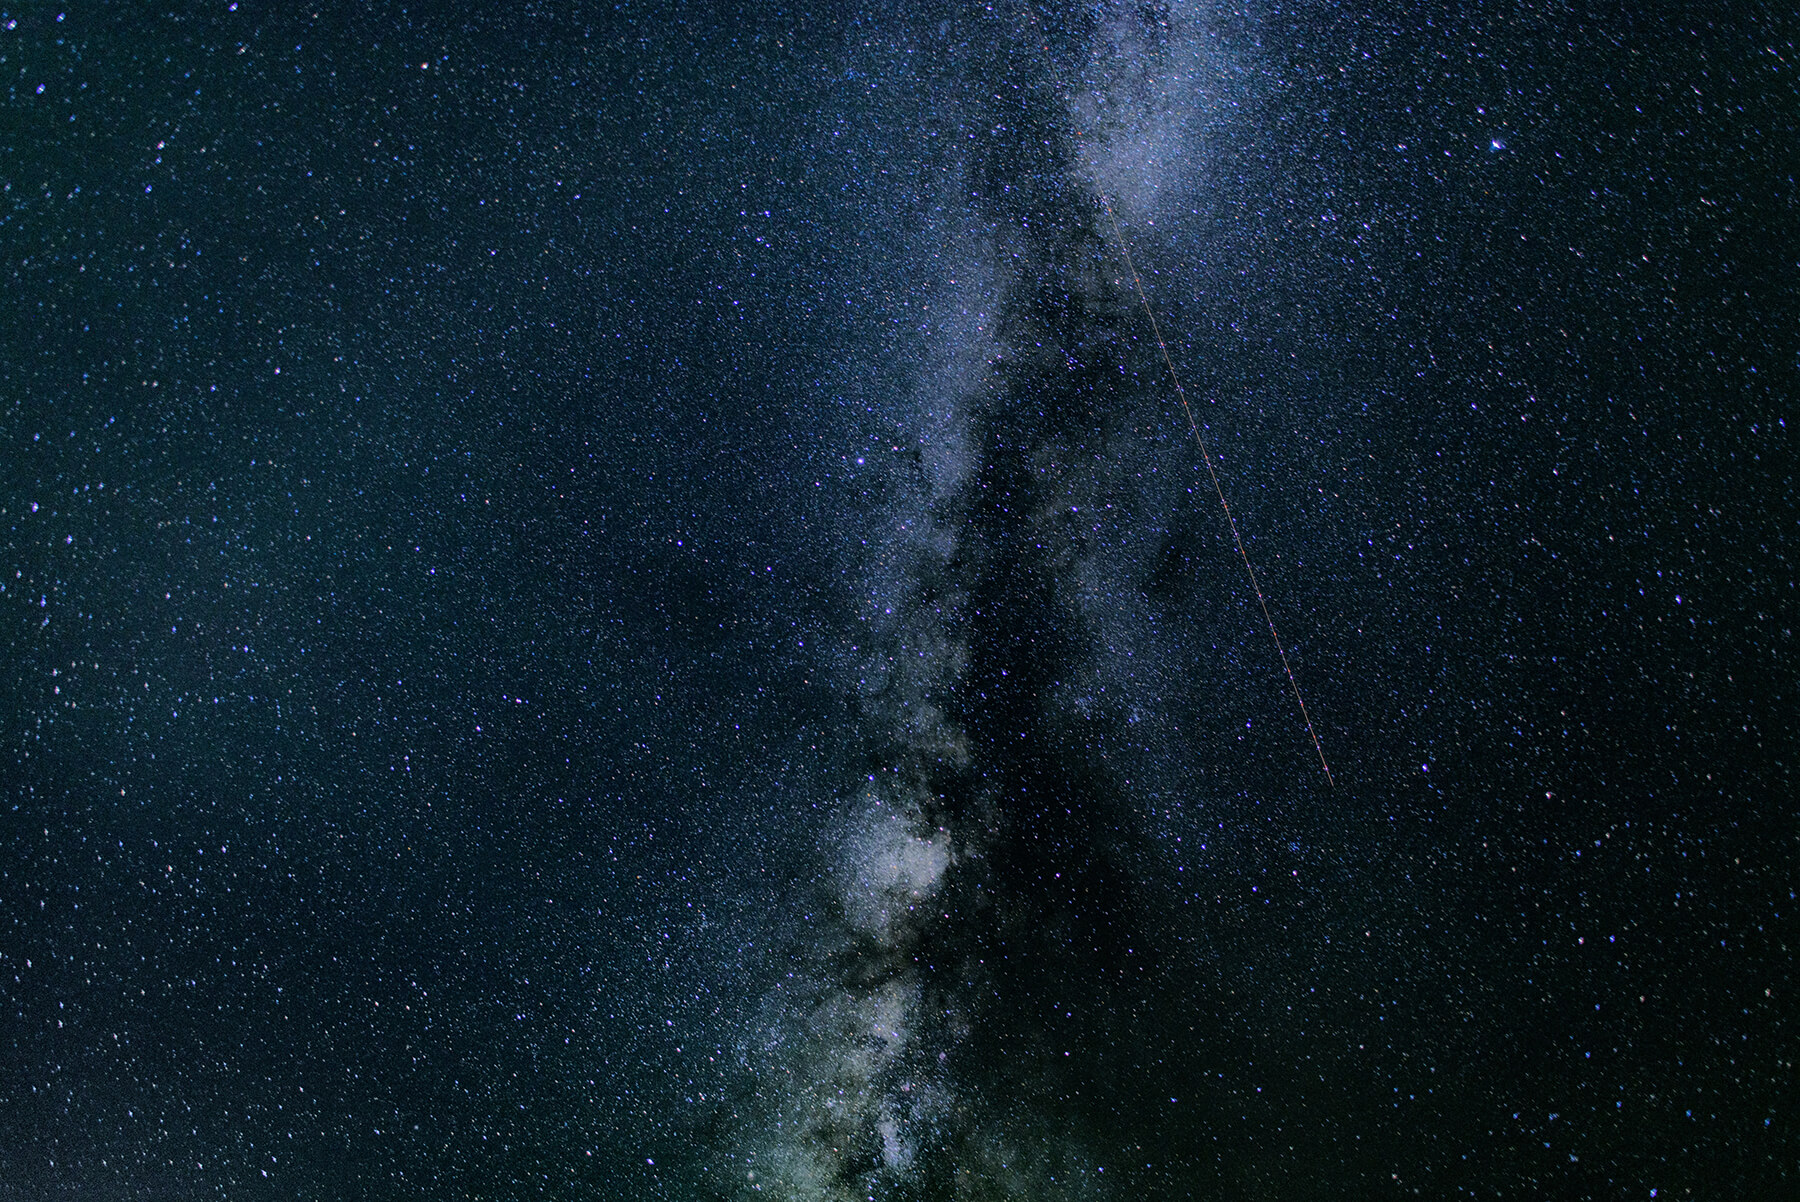
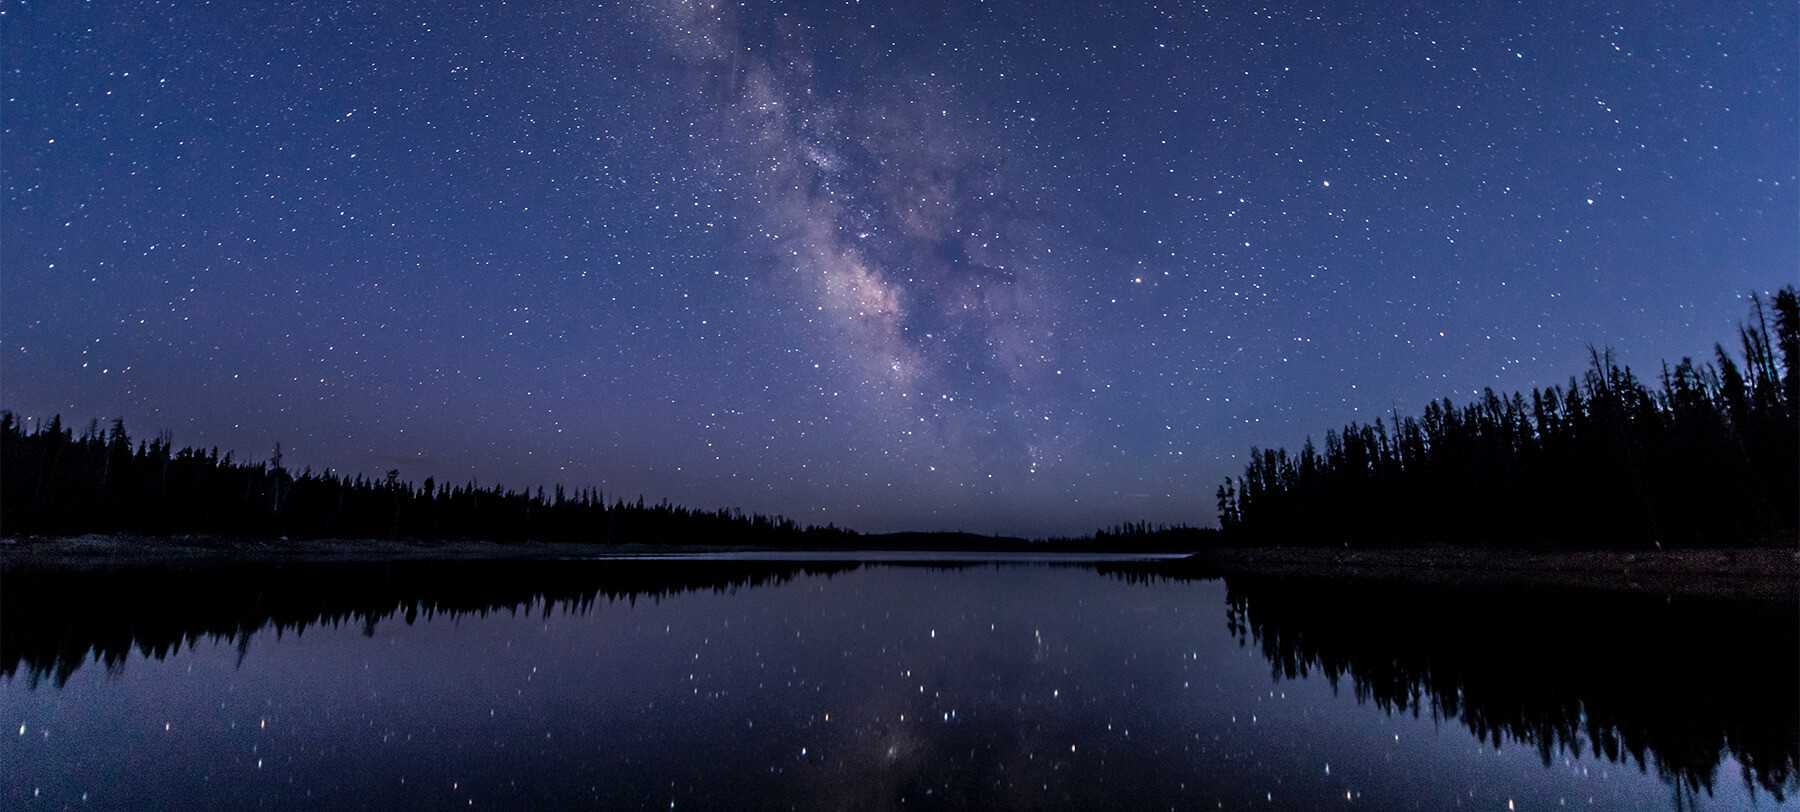
Image These sharp, pinpoint stars still required a 25secs exposure (credit: Nathan Anderson)
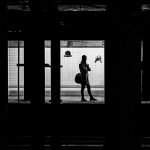
Our next tip sets us back on earth, but it’s one that can really improve your celestial snapshots. By finding a nice foreground, you can create silhouettes that give your astro photos another layer of depth. It’s easily done and definitely worth a try.
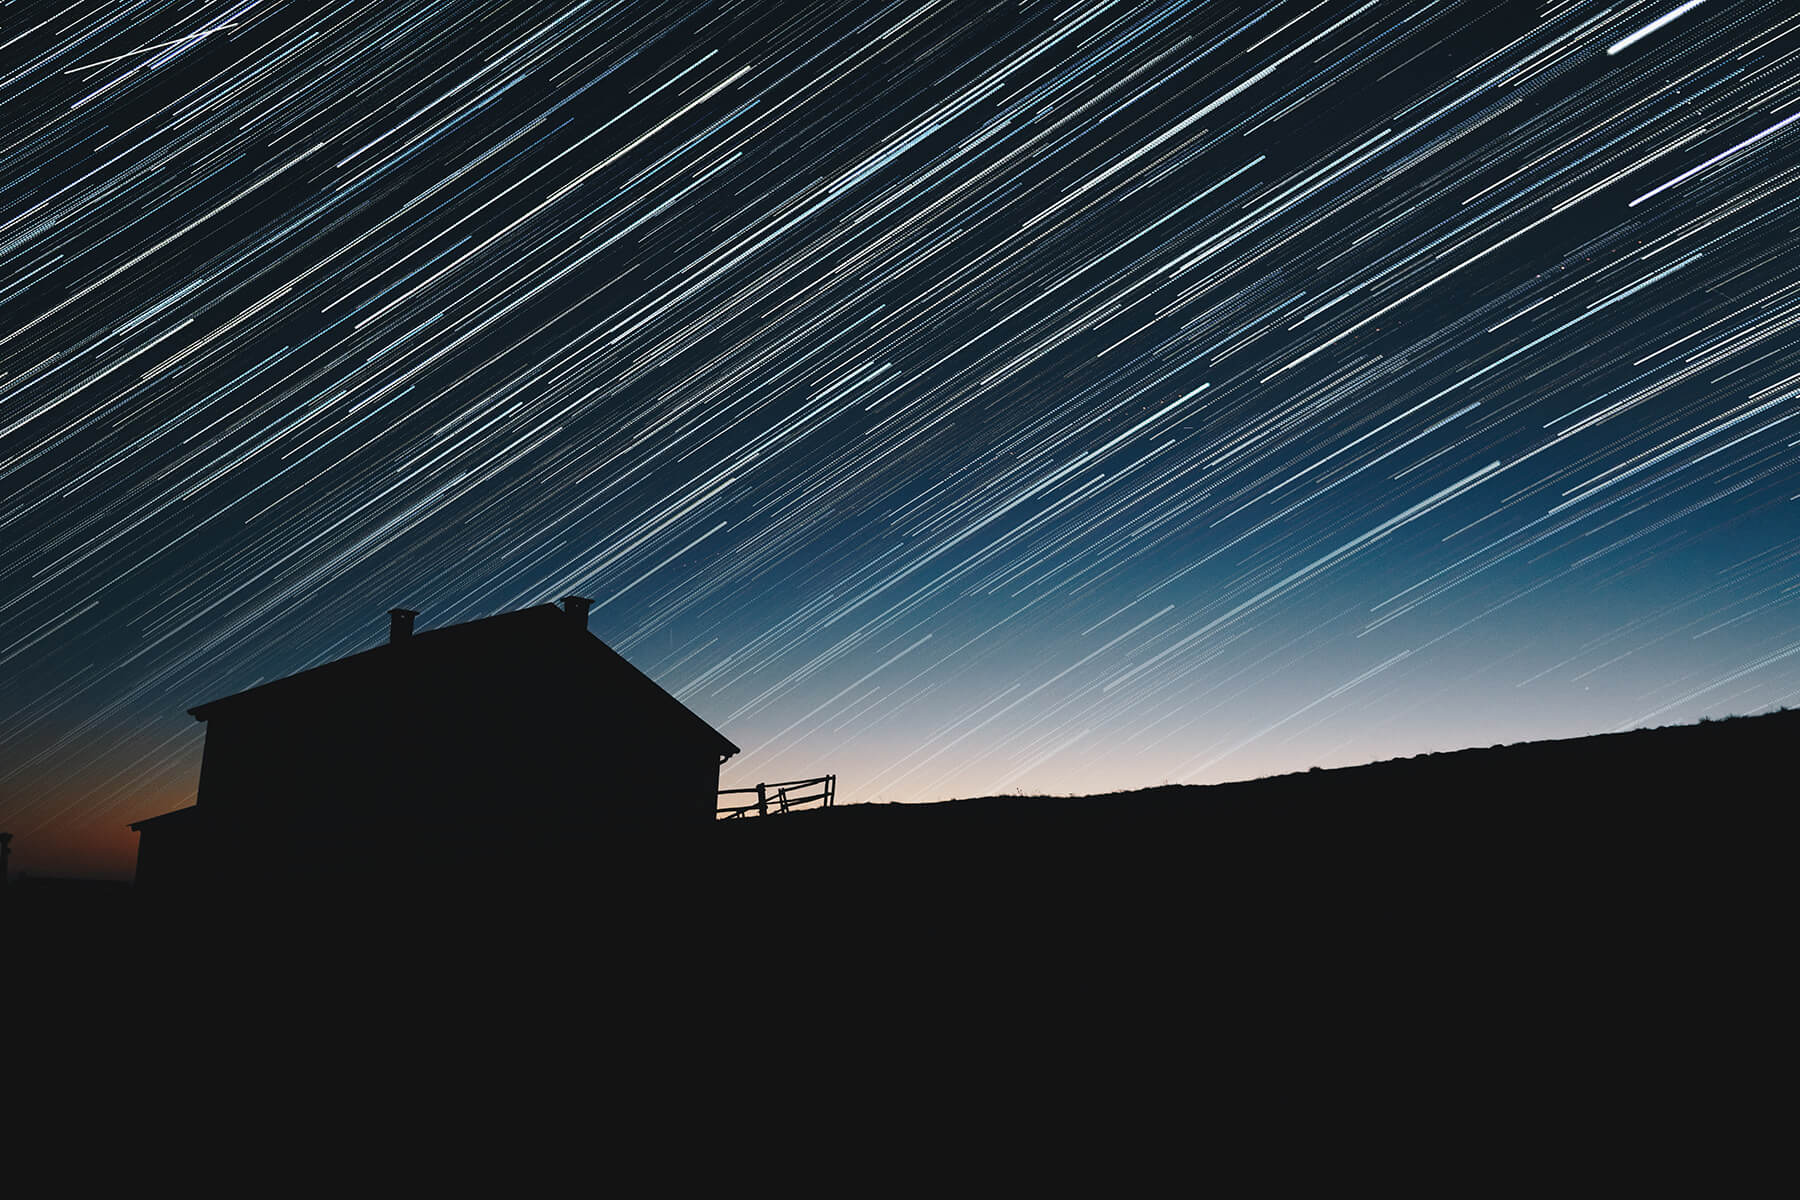
Image A silhouette can be created with any interesting foreground object (credit: Samuele Errico)
Another factor that can be easy to overlook is the moon. You might think it could add another interesting element to your astrophotography, but as a light source it will affect your exposure, resulting in less detailed stars. For the most part, the moon is best avoided.
Everything we’ve covered is only of use when the night sky is actually visible, so our final tip is this: plan your shoot! You can even go beyond just scheduling for a clear night and find out if there are any interesting astronomical events coming up.
Now you’re ready for some interstellar shooting! Show us what you’ve got and tag us in your photos on social media using the tag @PhotonewsPN.