How to photograph star trails
Posted on May 21, 2020 • 9 minute read
Star trails make for truly mesmerising photos, and they’re something every photographer should try at least once. Here’s how to get the best results.
In issue 77 of Photography News, as part of the ongoing Photography News Summer Festival, we gave you an extensive guide on slow shutter speeds. It’s filled with essential know-how, so we’d certainly recommend giving it a read. You can find it free in our online issue library.
There are many, many creative uses for long exposures, but perhaps none quite so awe-inspiring as star trails. While fairly time-consuming, they’re actually very easily done, so the juice is worth the squeeze.
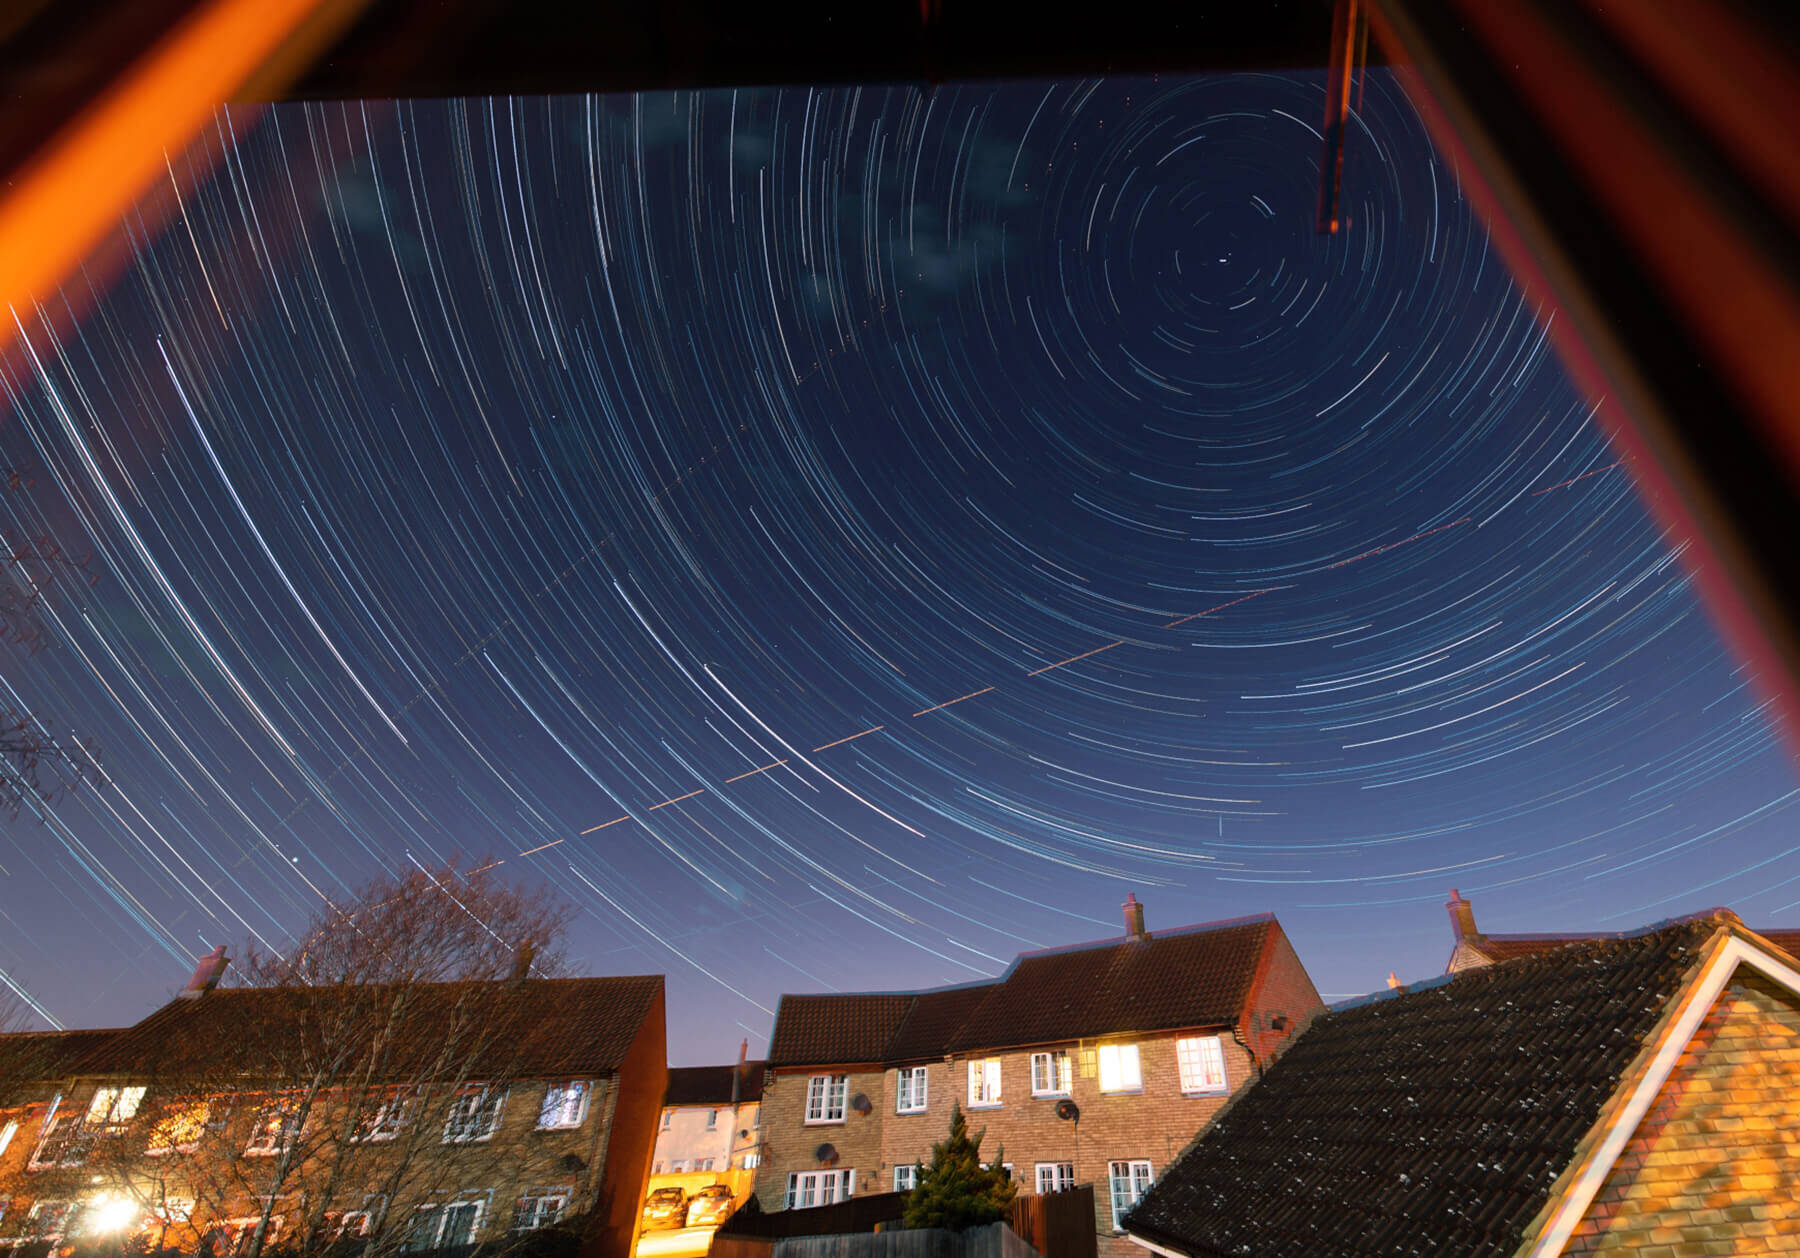
At the time of writing, we’re still in a state of lockdown, but one of the joys of star trails is that they can be taken from anywhere with a view of a clear night sky. That could mean shooting from your garden, balcony or even through a window, provided there aren’t too many obstructions or too much light pollution.
The length of your star trails depends on how much time passes. The longer the time, the more movement you’ll be able to capture. One option is to shoot one incredibly long exposure, but this isn’t the best method – you’ll likely capture a serious amount of digital noise and completely burn out any highlights. The best option is to stack a number of individual shots.
First, you’ll need to dial in your settings. There’s no one set of correct settings, rather general guidelines that will vary based on conditions and kit.
Start with a middling ISO setting like ISO 1600 or 3200 and, for aperture, open up your lens as wide as you can. It’s unlikely you’ll have any foreground subject matter close to the camera, so the shallow depth-of-field caused by the fast aperture shouldn’t matter. As for shutter speed, start with something around 4 or 8secs and shoot a few test shots.
There’s no downside to using exposures of just a few seconds other than having to capture more shots, and in some cases, a shorter exposure will be all that’s needed. Provided you aren’t going to use any of the individual stills from your stack, there’s no real downside to exposures of a minute or more, either, other than a more detrimental effect to the stack if one of your shots is ruined and a possible overexposure of highlights if there are any artificial light sources in the frame.
If you are likely to want to take a still from your stack, or perhaps create a time-lapse as well as a star stack, keep your exposures relatively short. As a good rule of thumb, dividing 500 by your focal length tells you roughly how long an exposure you can take without picking up the Earth’s rotation and blurring your stars.
Particularly if you are using a shorter shutter speed and taking more photos, it may be a good idea to shoot smaller JPEGs rather than large Raws, if this is viable. This will save your computer a fair bit of work later on.
With your exposure settings chosen, set up on your tripod and get the composition organised. Next, choose manual focus and set focus to infinity, but don’t assume the infinity focus marker will be perfectly accurate. A few more test shots will help, and if your camera has the option, a magnified preview can be of real use, too. It’s highly unlikely you’ll have a clear view of a single star, so just adjust your focus until you find the point that the star appears smallest and sharpest.
Be sure to zoom in on your test shots to double-check before you make a final decision on focus. Modern innovations like the Olympus OM-D E-M1 Mark III’s Starry Sky AF are making this step easier than ever.
Finally, you’ll need to set your intervalometer or camera’s internal time-lapse mode (you’ll have to shoot each picture manually if none of these features are available to you). This means choosing the time between shots as well as how many shots will be taken overall.
The former will determine how smooth your star trails are, and if you leave too long a gap, you’ll capture dotted lines rather than clean trails. A few seconds typically works well.
With your shot set up and settings dialled in, you can start your camera shooting and leave it to do its thing. You may wish to stick around for a few minutes to make sure everything is going smoothly, just be wary not to introduce any unwanted light sources.
Now, with your shots captured, it’s time to stack. Thankfully, just like shooting, this is very simple.
If you don’t have access to an editing software with layer functionality, there are many free tools online that are specifically designed for stacking star trails. One that we’ve used successfully is StarStaX, which is free to download for Windows and Mac.
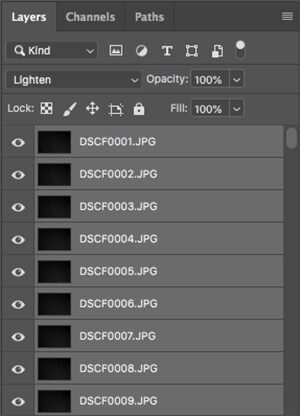
The more advanced option is a software like Photoshop. Before stacking your images, you may wish to resize them in batches to make them even smaller. Depending on how long you want your trails to be and how long your individual exposures were, you could easily be working with 200+ photos.
In Photoshop, the steps are very simple – just click File > Scripts > Load Files into Stack… Once loaded, select your top layer, hold SHIFT and click your bottom layer to select them all, then change the blending mode from Normal to Lighten. This will create your trail.
With the more advanced software, you can do more with the image, like remove unwanted aeroplane trails you may have captured or even add a foreground subject that wasn’t present at the time.
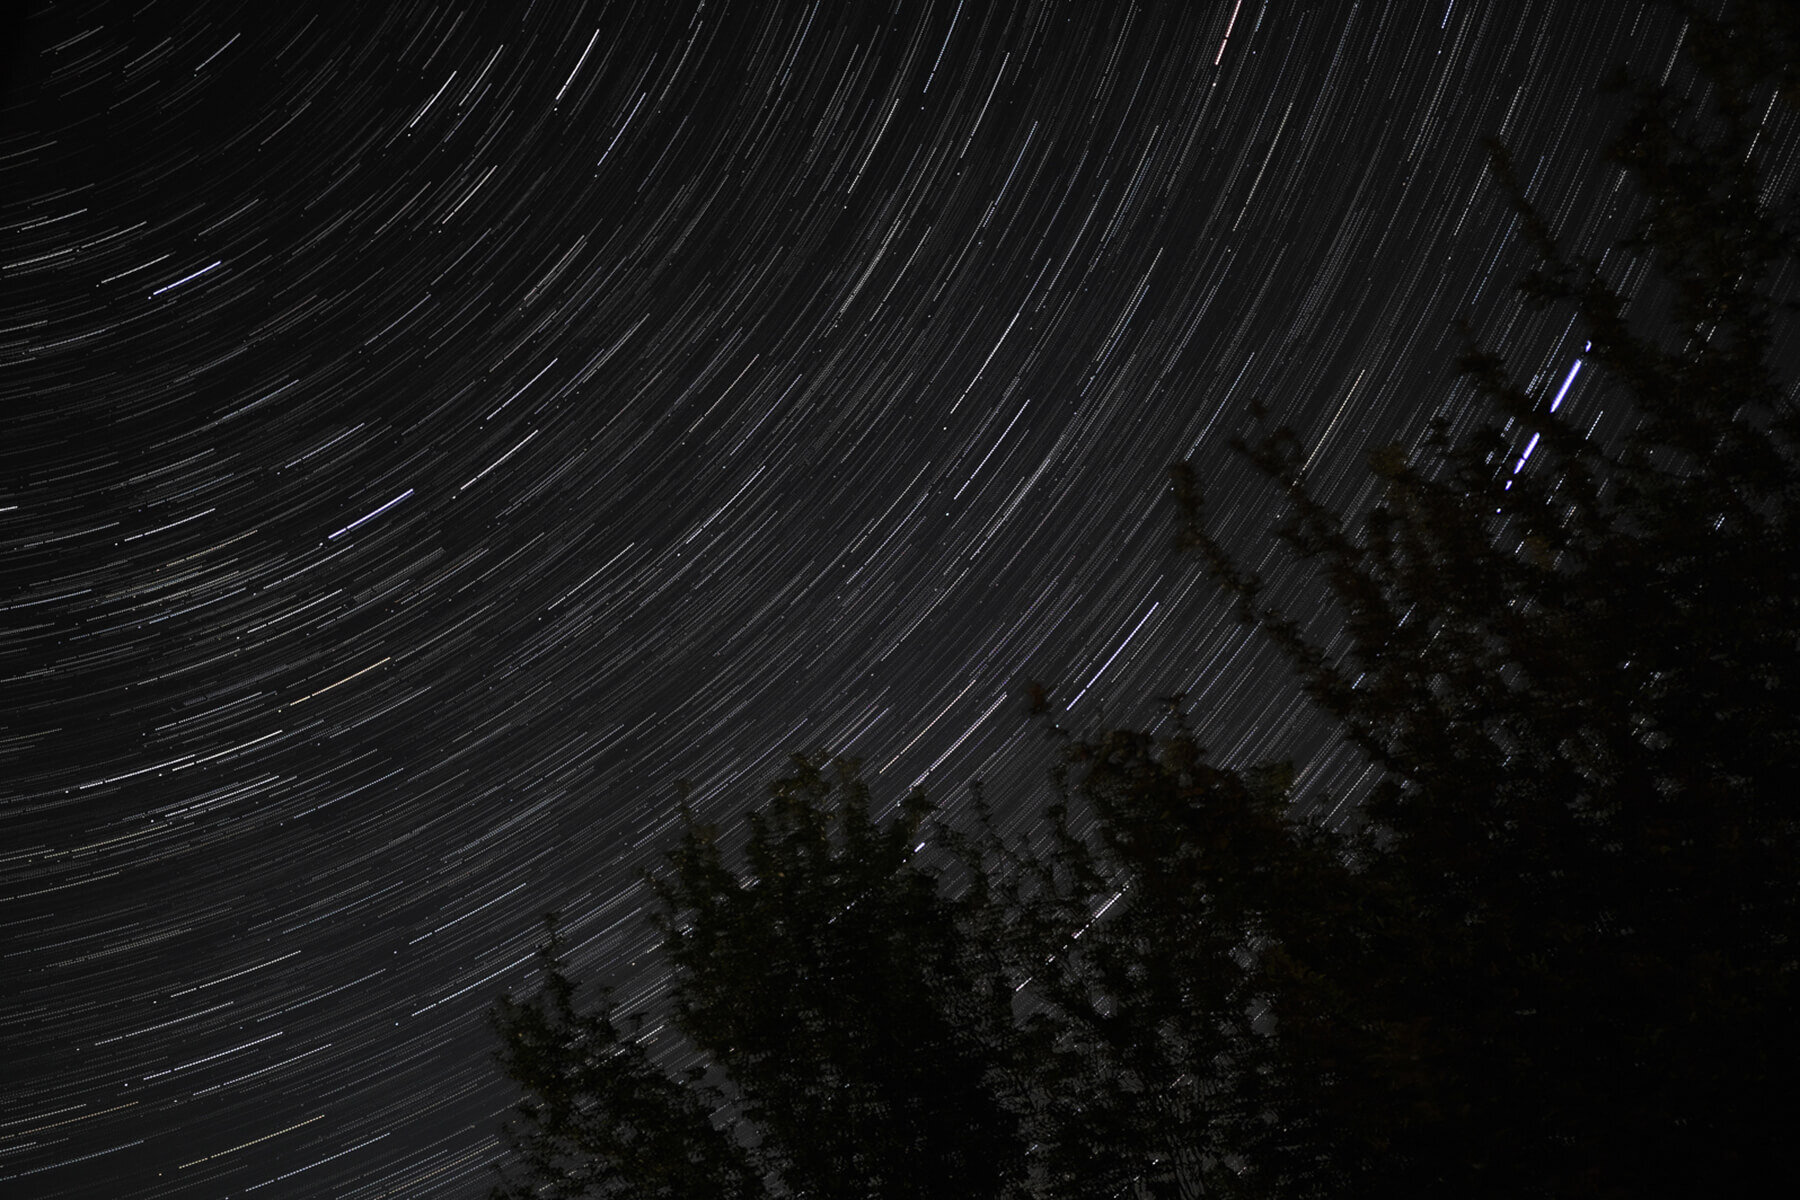
Click the images to see a larger view


Adding a foreground in post certainly isn’t one for the purists, but if you do want to add more interest to your star trails, it’s an option. Particularly in the current circumstances when you may not have access to a more pleasing scene, or if your foreground is likely to blur when stacked due to movement, this could be a good approach. To do this, place your isolated foreground as the top layer in your stack, ensuring blending mode is Normal.
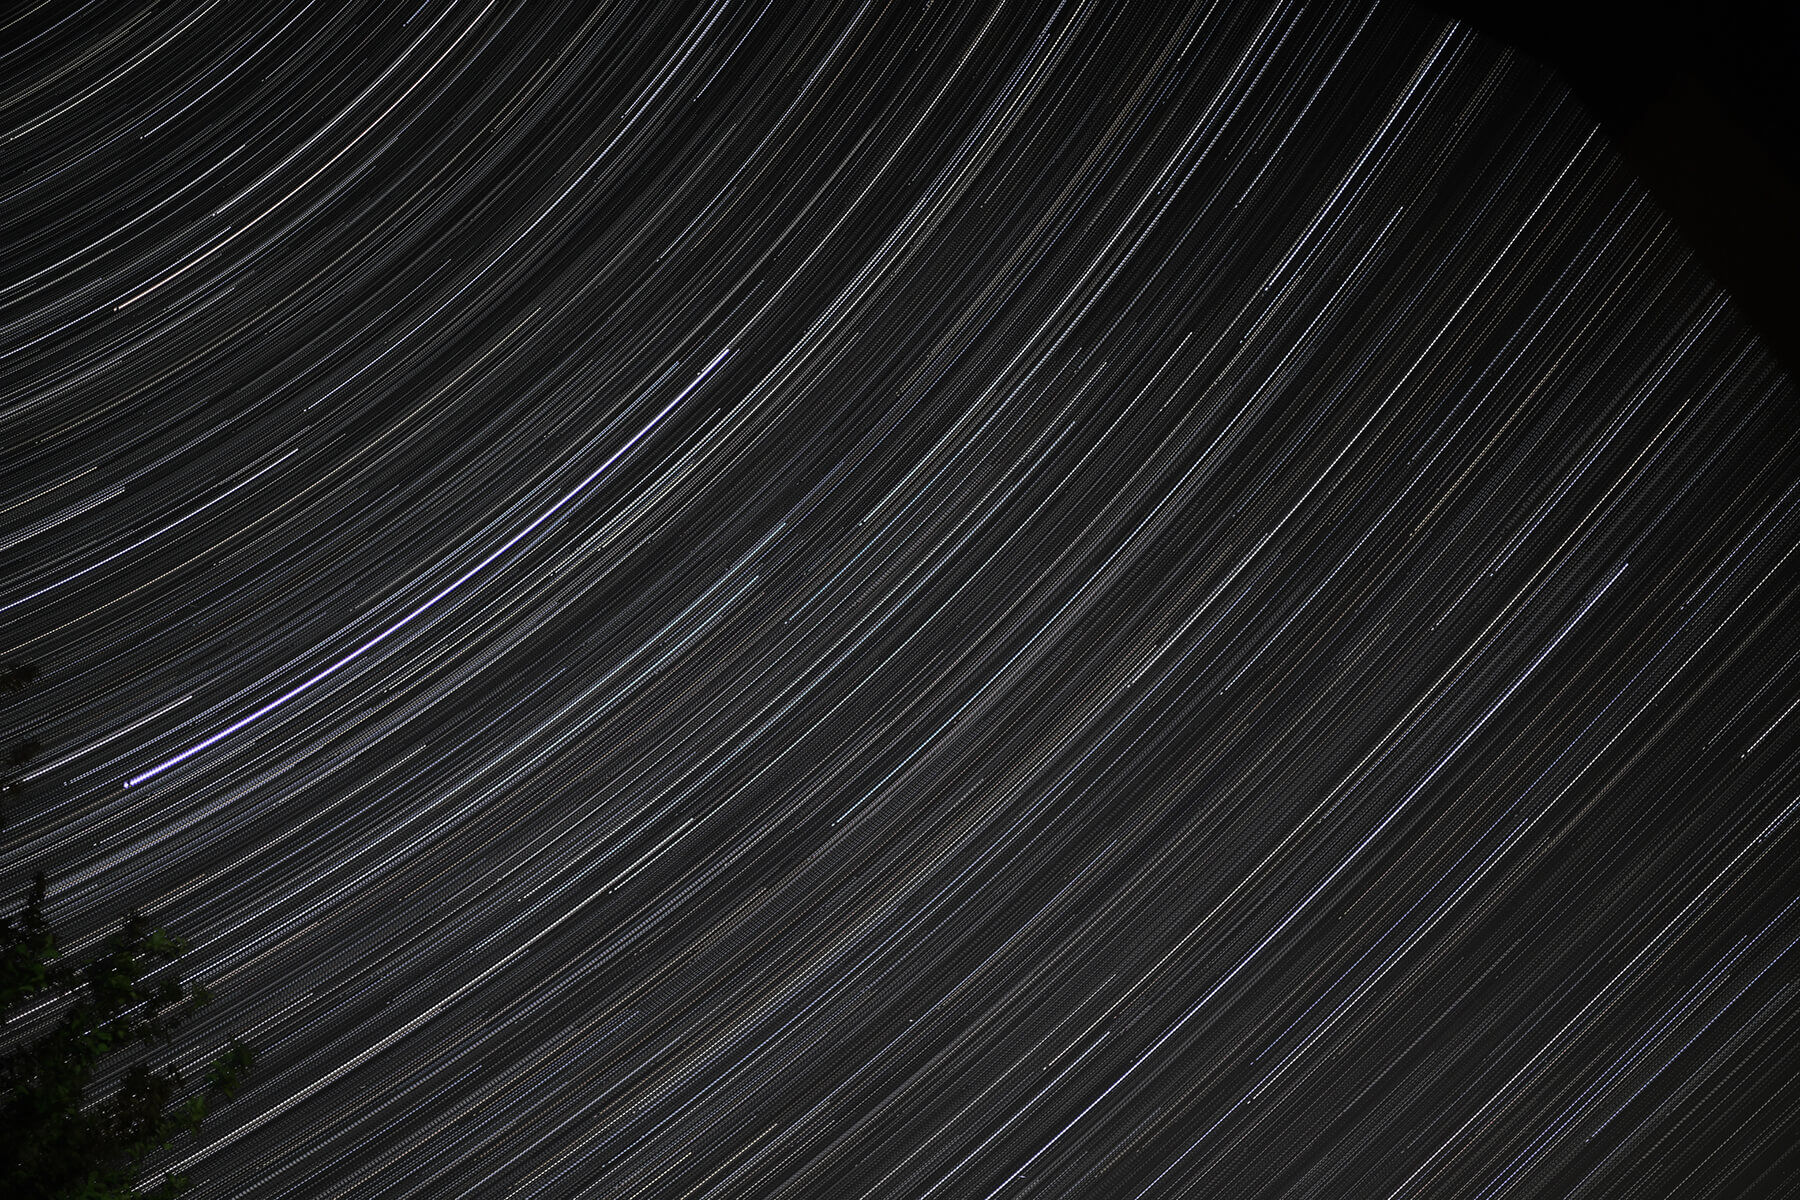
Click the images to see a larger view


That’s everything you’ll need to create some awe-inspiring star trails! When you do, we’d love to see the results, so tag us in your photos on Instagram, Twitter or Facebook using the handle @photonewspn
As the Photography News Summer Festival continues, we’ll be bringing you more great content across the magazine, website and even the podcast. Issue 77 covers mirrorless cameras, long exposures and video basics, so expect more features following the theme online over the next three weeks!
Don’t forget to sign up to receive our newsletter below, and get notified about the new issue, exclusive offers and competitions.
Have you heard The Photography News Podcast? Tune in for news, techniques, advice and much more! Click here to listen for free.