Mastering manual exposure: effects of adjusting aperture, shutter speed and ISO
If you read part one of our manual exposure guide, you’ll know there’s more to manual exposure than just making sure it’s not too bright or too dark. Aperture, shutter speed and ISO all have practical and creative effects on your photos. Now you understand the basics of exposure and what settings control it, let’s dive into their effects and uses.
If you missed part one or need a refresher, you can find it here.
Read time: 4 minutes
Effects of aperture
Aperture is a measure of how much light enters through your lens, and not only is it one of the most significant factors in manual exposure, it plays a huge role in the look of your photography, too. The reason for this comes down to what we call depth of field.
Depth of field refers to how much of the image is in focus, measured by depth within the image. With a deep depth of field, everything (or almost everything) within the image will be in focus whether it’s close or far from the lens, while with a shallow depth of field, only a specific ‘slice’ of the image will be in focus.
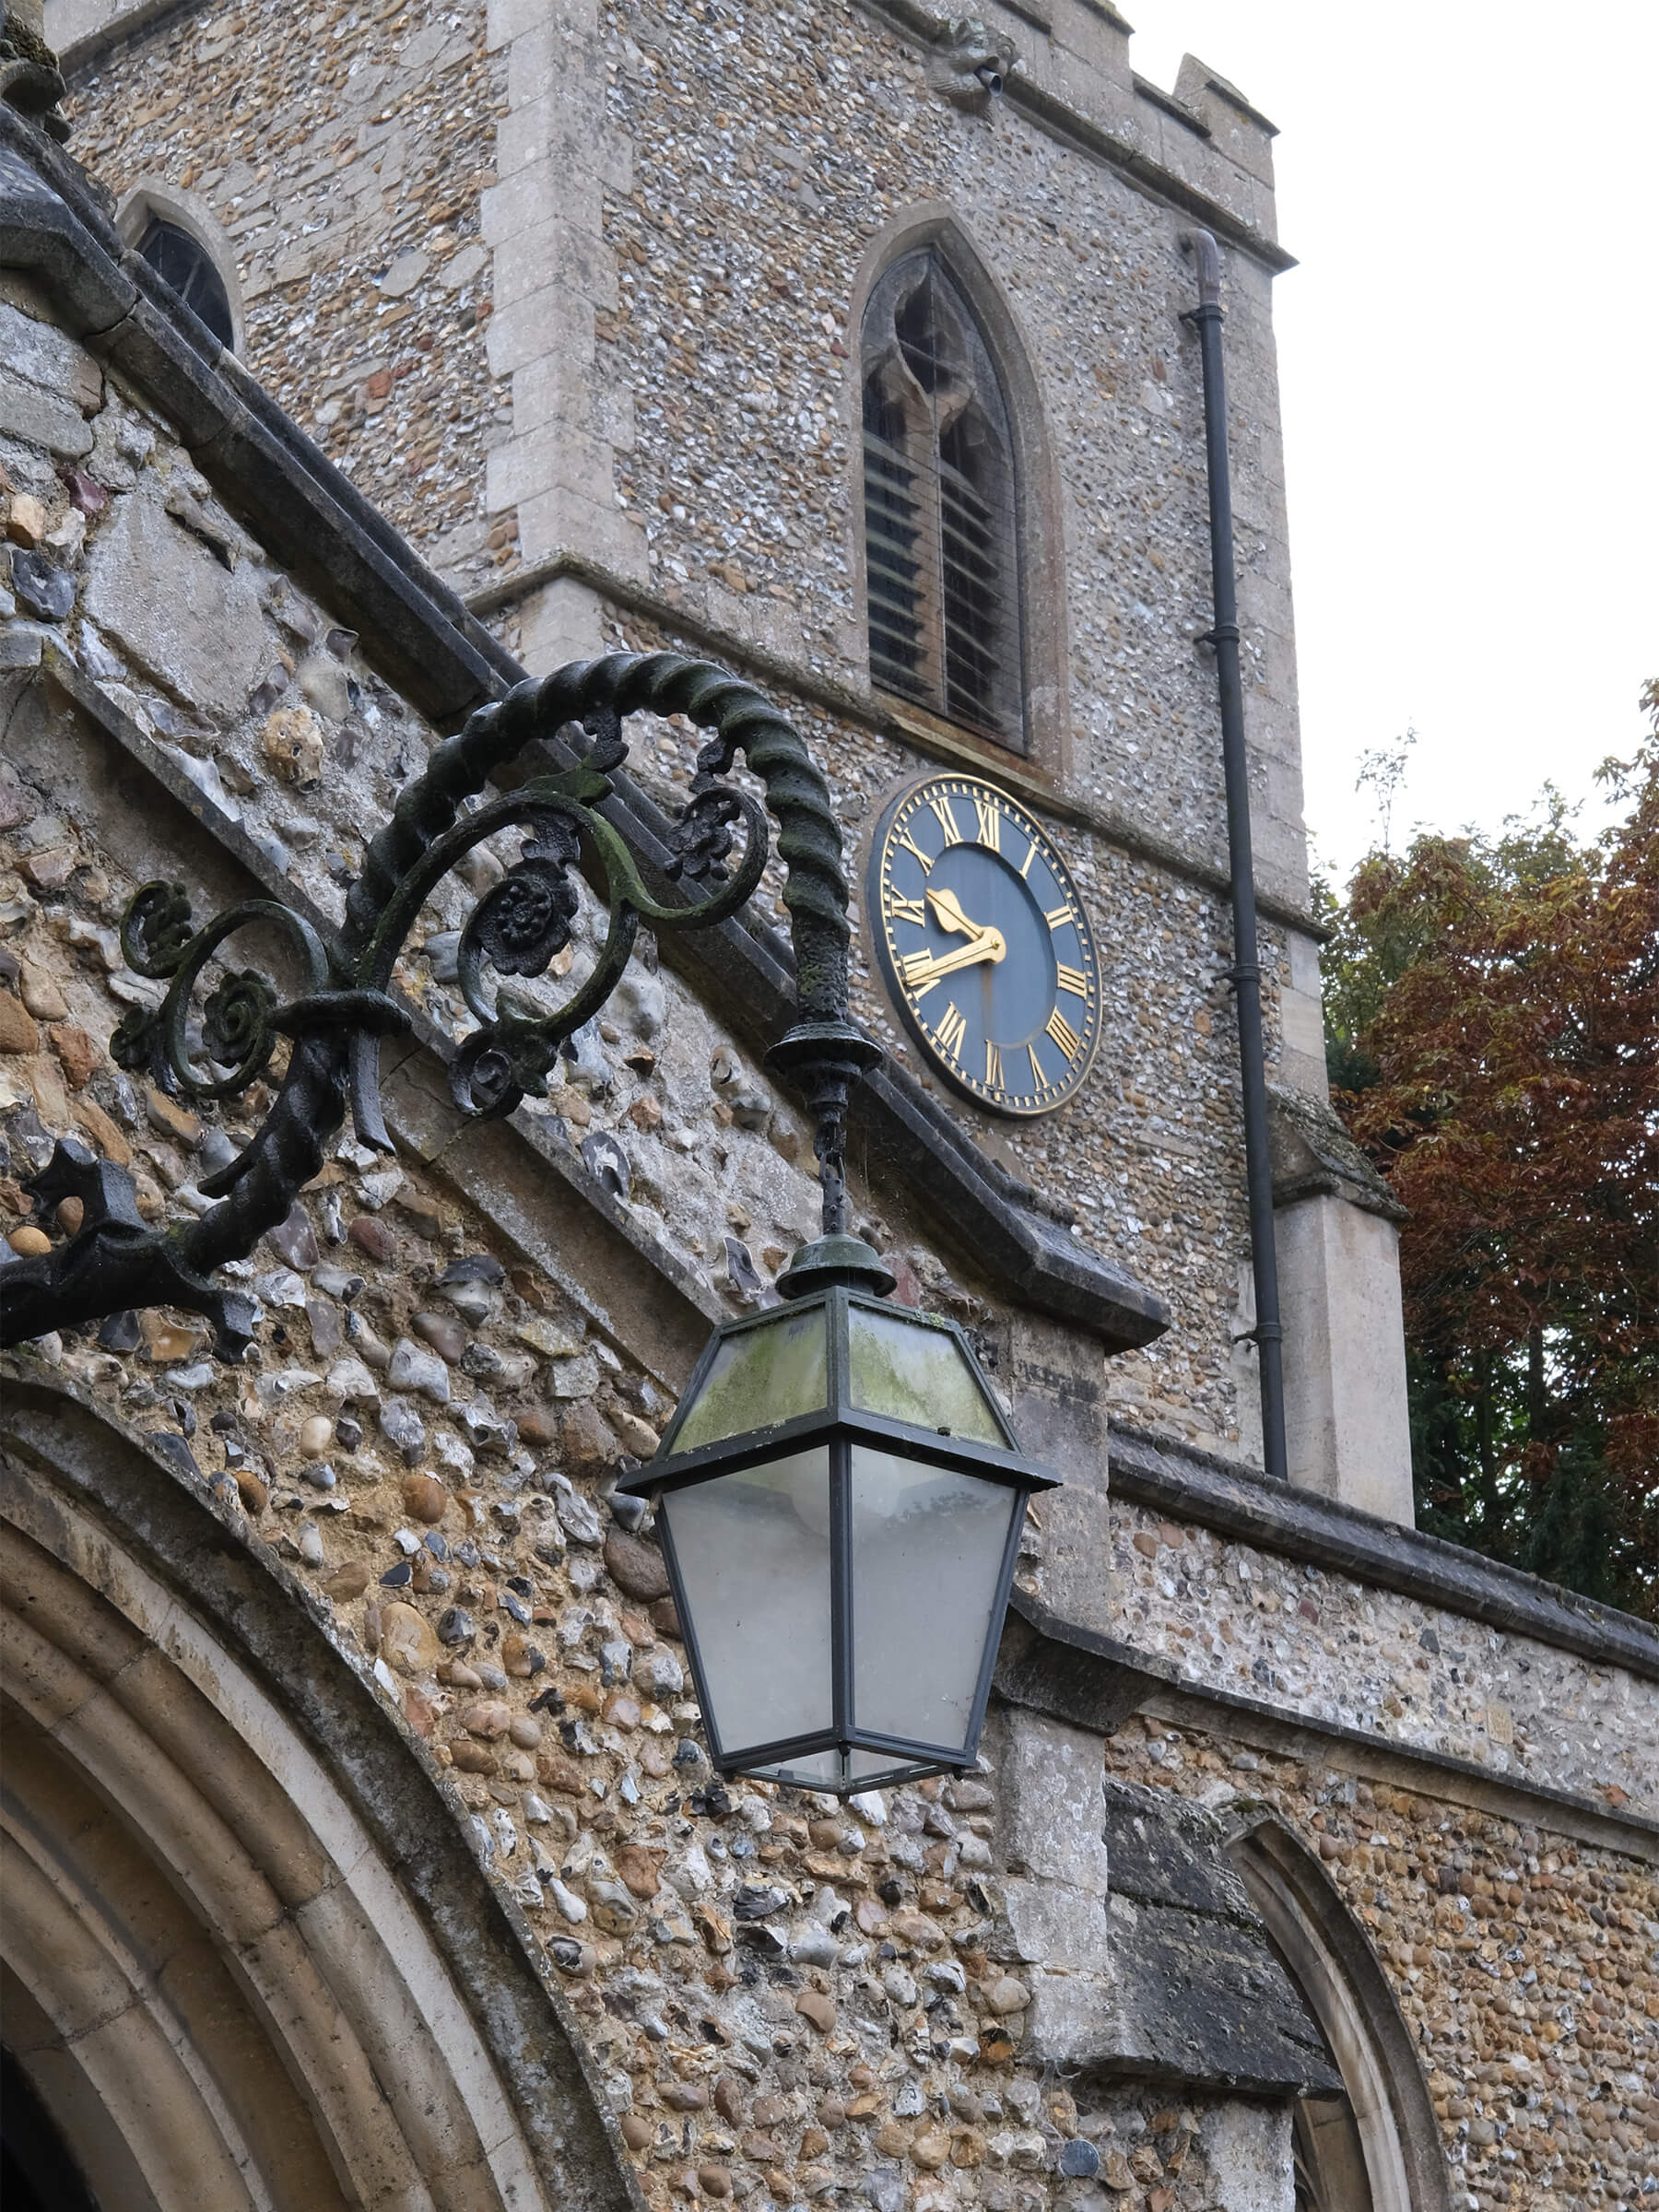
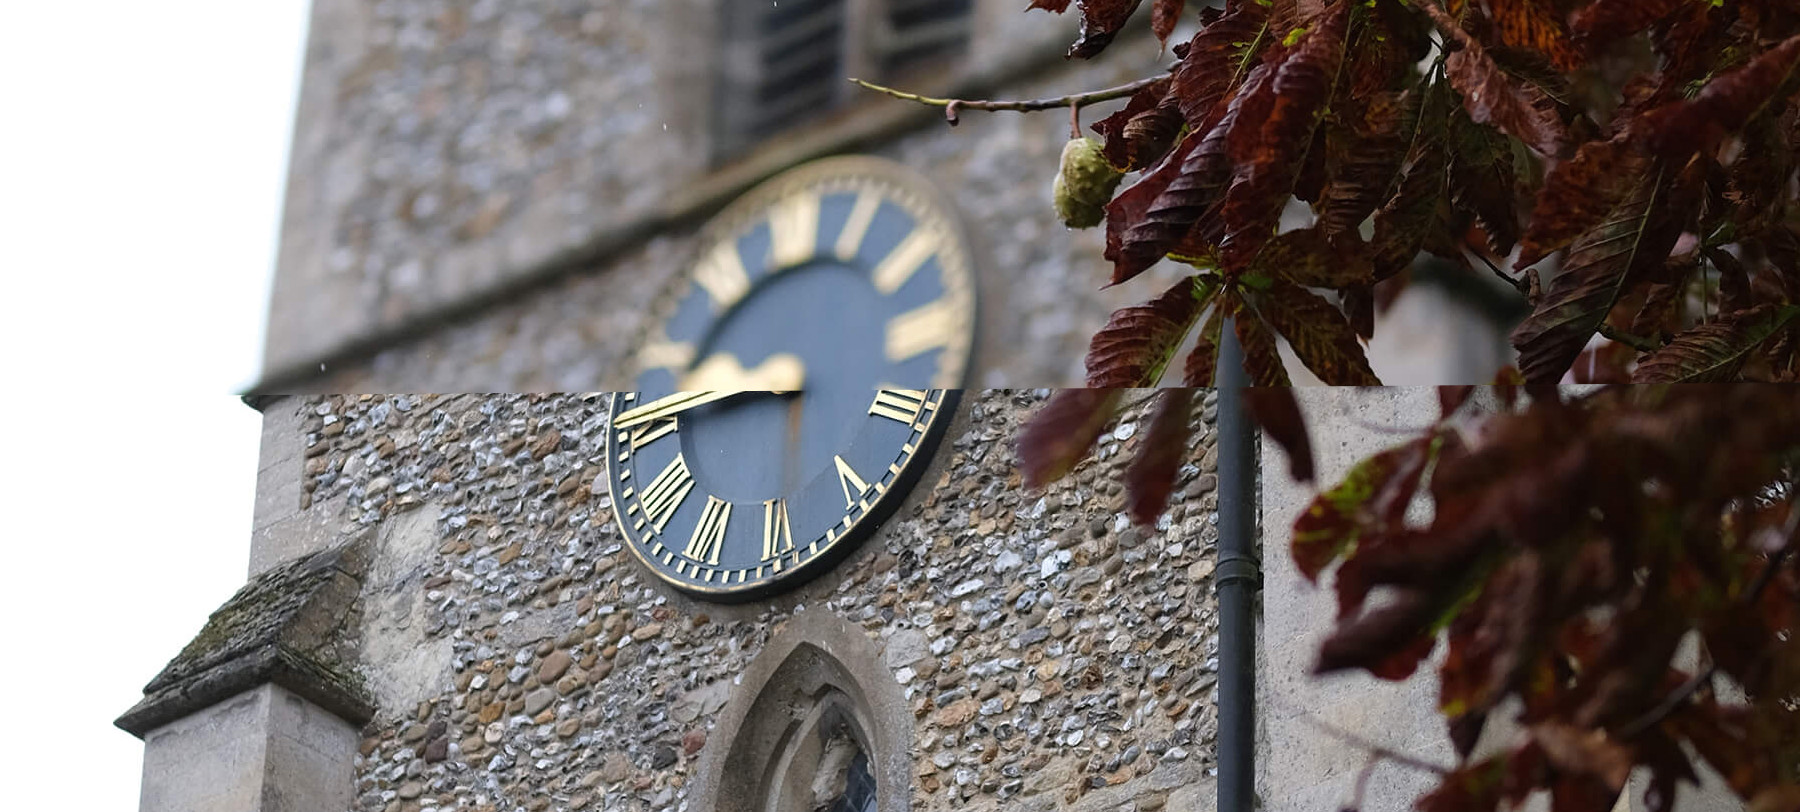
Image At f/16, both the lantern and the clock are in focus
Click the images to see a larger view


Without going into the whys, all you need to know is this: the lower the aperture, the shallower the depth of field, and the higher the aperture, the deeper the depth of field.
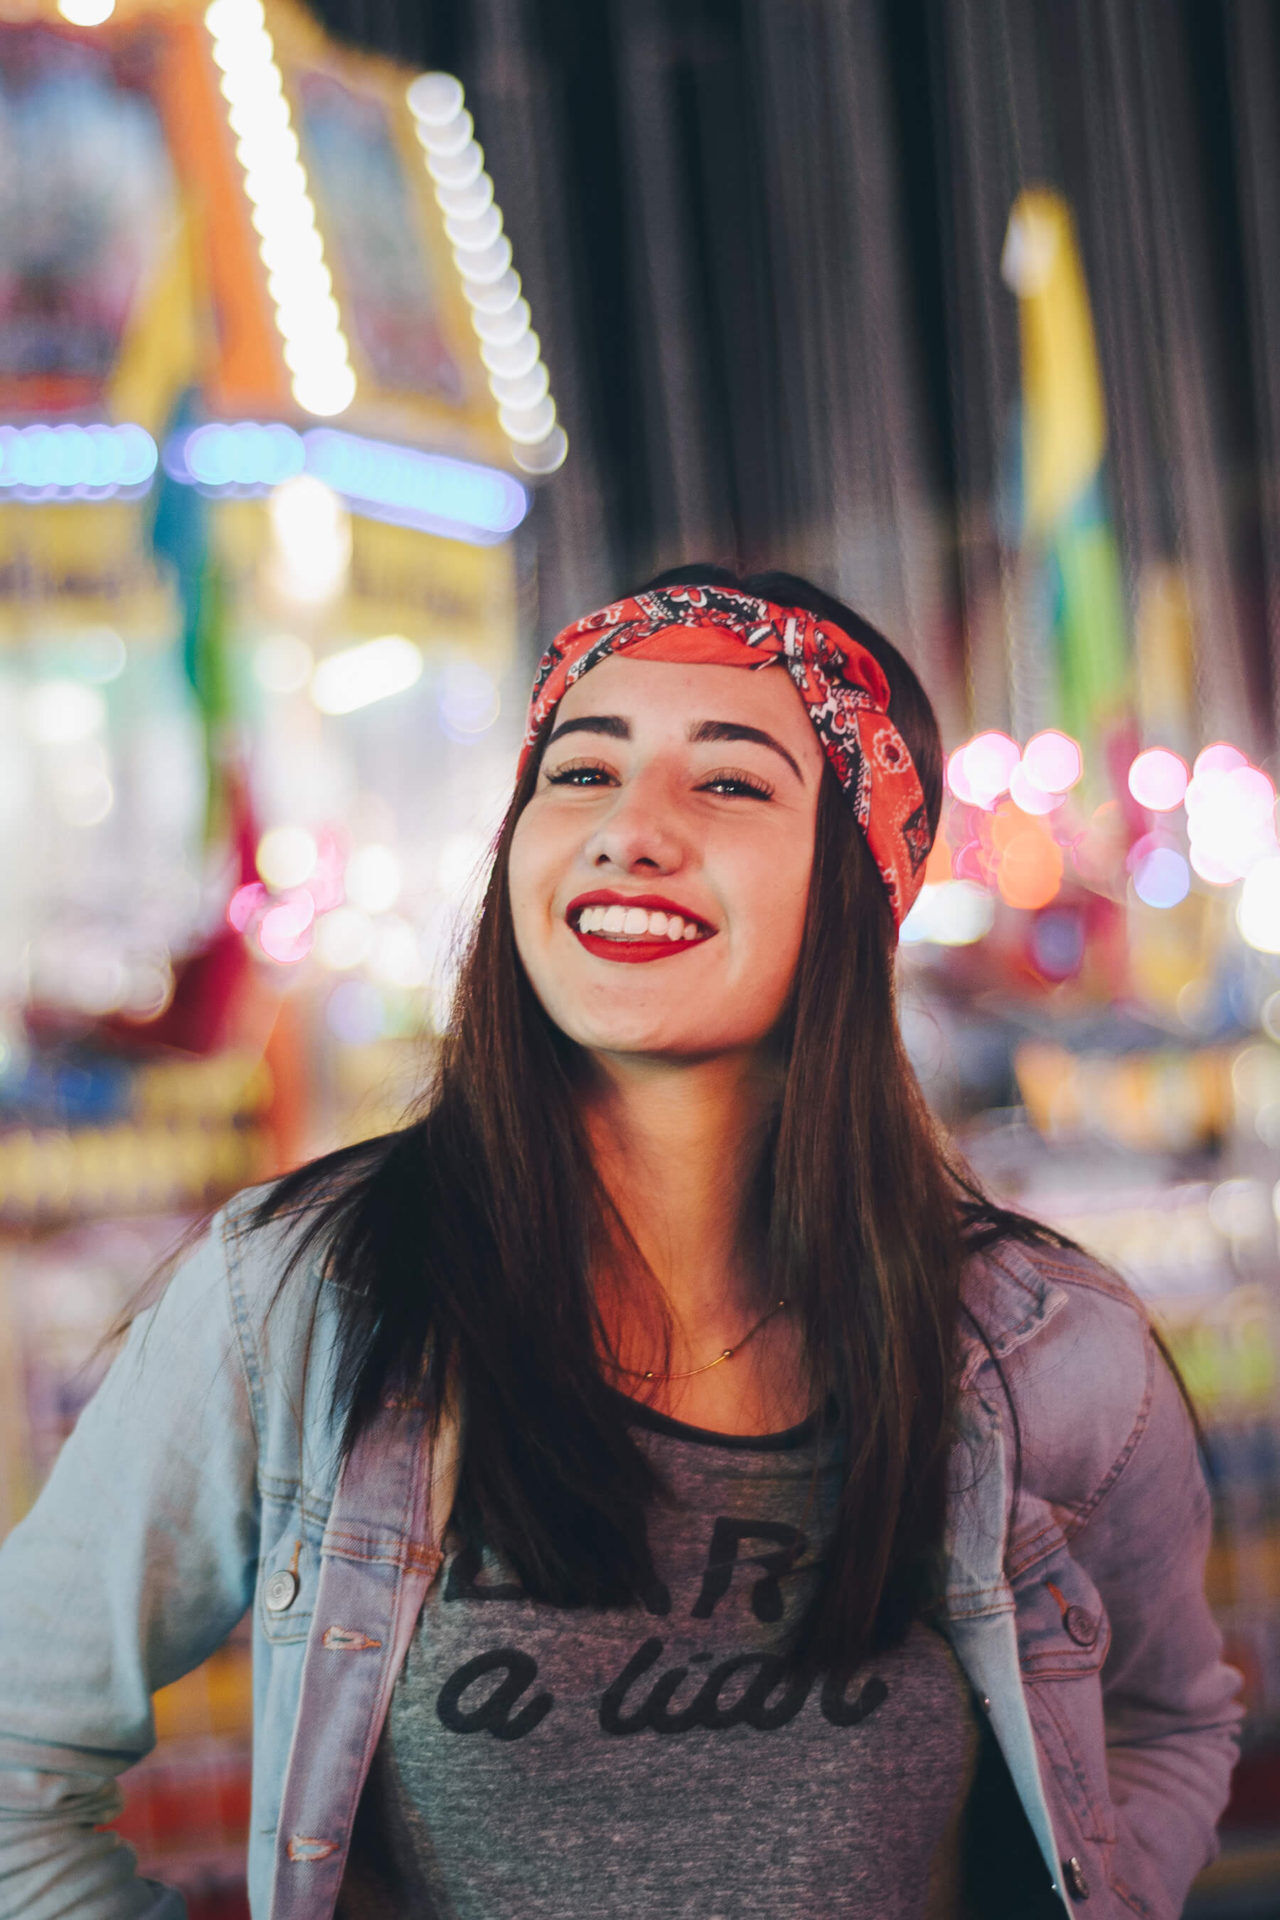
Through depth of field, aperture is also responsible for a beautiful effect called bokeh. You’ve likely seen this many times, but have never known what it is or why it happens. In short, bokeh is the way a lens captures blurred, out of focus light. As you now know, with a lower f/stop you have a shallower depth of field meaning more out of focus elements in your photo. To try the effect, open your lens to the lowest possible aperture and make sure the light source in your photo is out of focus. Try taking a portrait with some fairy lights in the background and you should capture some beautiful bokeh behind your subject.
As we covered in part one, exposure is all about finding a balance between aperture, shutter speed and ISO, so if you want to open your aperture up wide, you’ll have to adjust your other settings accordingly. In bright light, it won’t be possible to open your aperture beyond a certain point without the use of an ND filter to block some of the light, regardless of your shutter speed and ISO.
Most cameras feature an aperture priority mode. This is like a step between manual and auto settings, in which you can manually set your aperture and let the camera choose your shutter speed and ISO accordingly. Not only is this feature hugely helpful for beginners, it’s very convenient for photographers of all levels.
Effects of shutter speed
Just like aperture, shutter speed has a significant impact on how your photos look beyond pure exposure. Shutter speed has both functional effect and creative potential.
As we discussed in part one, shutter speed determines how long the shutter is exposed to light, and as such, it controls how the sensor captures. Not only how much light, but how much movement, too.
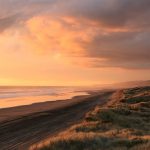
Think about this: how far could you move your hand in the space of one second? What about in 1/1000 of a second? When we apply this to shutter speed, nothing changes. The shutter speed determines how much movement is captured, whether it’s the movement that takes place over one second or 1/1000 of a second.
Click the images to see a larger view


To summarise, if you want to capture a fast-moving object without motion blur, use a fast shutter speed! Slow shutter speed allows for a creative technique called long exposure, but we’ll cover that next week alongside a host of non-exposure-related creative settings.
Like aperture priority, your camera will likely feature a shutter speed priority mode, so if you need a specific shutter speed and aren’t worried about aperture and ISO, this is a convenient option.
Effects of ISO
For the most part, ISO has less of an impact on the look of your photographs than aperture and shutter speed does – when shooting in a native range that is. The native ISO range differs from camera to camera and going beyond this range leads to noise in your pictures. Noise is what we call a graininess in a photo, particularly visible in the dark parts.
Click the images to see a larger view


For most photographers, ISO is used purely as an exposure tool, but it’s important to know that it does have an effect beyond that. Try to ensure you’re staying at a fairly low ISO to avoid grainy ‘noise’ in your photos.
There you have it! You know how to control manual exposure and what each setting does, both practically and creatively. It’s time to put that knowledge to good use and take some photos!
We’re sure you’ll shoot something great, so when you do, tag us in your photos on social media using the handle @PhotonewsPN!
If you’re looking for more tips, stay tuned for the next feature in the series, which will cover many of your camera’s creative settings beyond those used for exposure.